A Super Simple (and cheap) Bear scout Fishing pole
for the “A Bear Goes Fishing” Belt loop
By Eric W. Brown
Goals of this document:
- The primary goal is to show how to make a simple fishing pole to meet the Belt loop requirements, using only knots the boy have learned up to and including the Bear year.
- I’d like it to be inexpensive and the parts to be easy to source.
- I’d like it to be easy enough for a scout to build with the assistance of a parent, in a short amount of time.
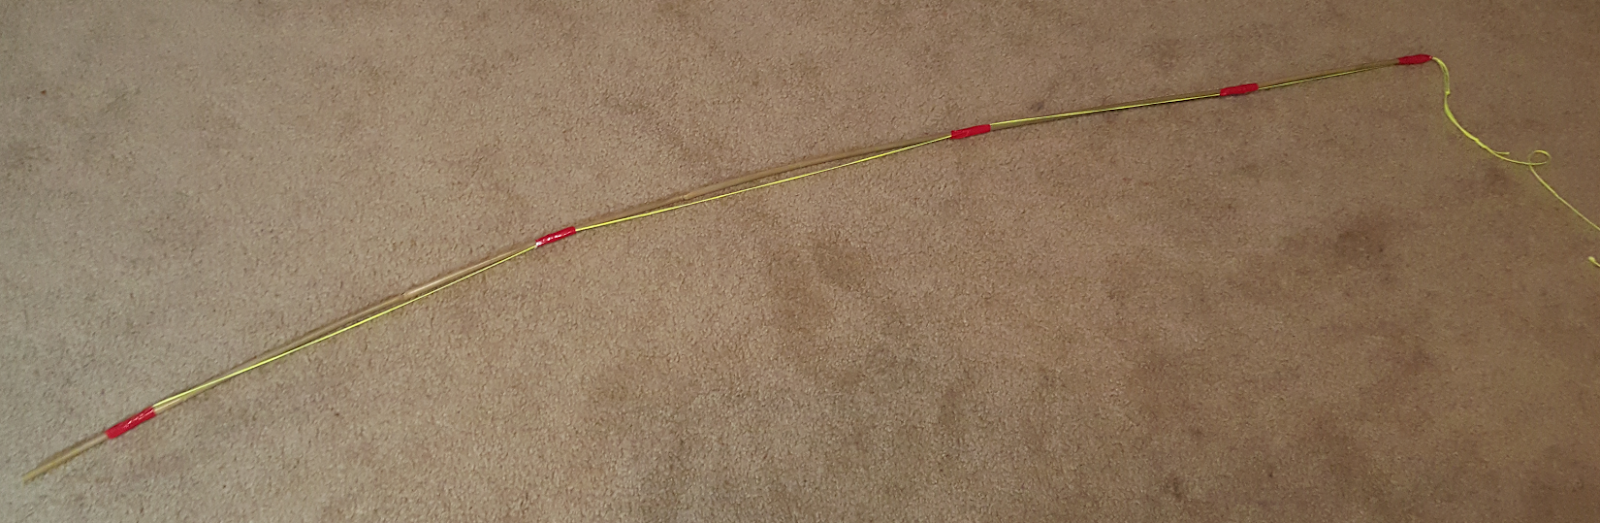
In short, I want you to be able to make one of these…
Parts:
A 6 foot pole
Masons Twine (really any strong braided twine will do)
Duct tape
Fishing line + any tackle you want to put on it.
Really that’s it… it’s that simple;
This design rips off idea from a lot of sources, including a Japanese fishing tradtition called tenkara, which eliminates a lot of the parts required from the fishing pole, replacing it with a loop.
Parts Sourcing:
6’ Bamboo Pole, or 6’ PVC pipe.
The thin bamboo poles used in this tutorial are available in the garden section at Home Depot. You get 6 poles for about $4 at the time of this writing.
They are used as garden stakes.. They are pretty thin, so if you want the poles to last longer, you can use PVC pipe, or ½” bamboo poles that you can buy on Homedepot.com for about $20 for 25 of them (but you have to have them shipped to you)
Knots Used:
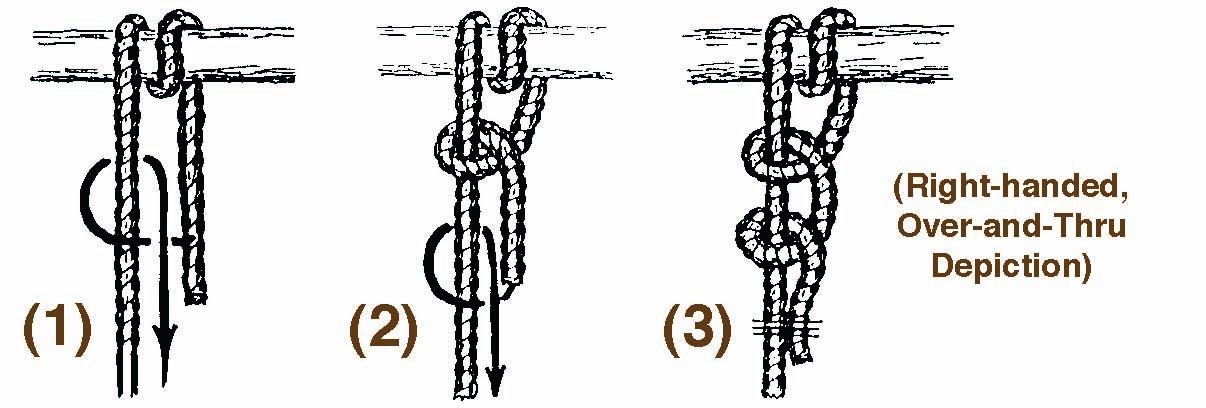
2 Half Hitches:
The first knot we are going to use is the 2 half hitches, which the boys learned this year. Just like in the picture we are going to wrap it around the pole extra times, but we are going to wrap if 5 or 6 times, then tie the knot.
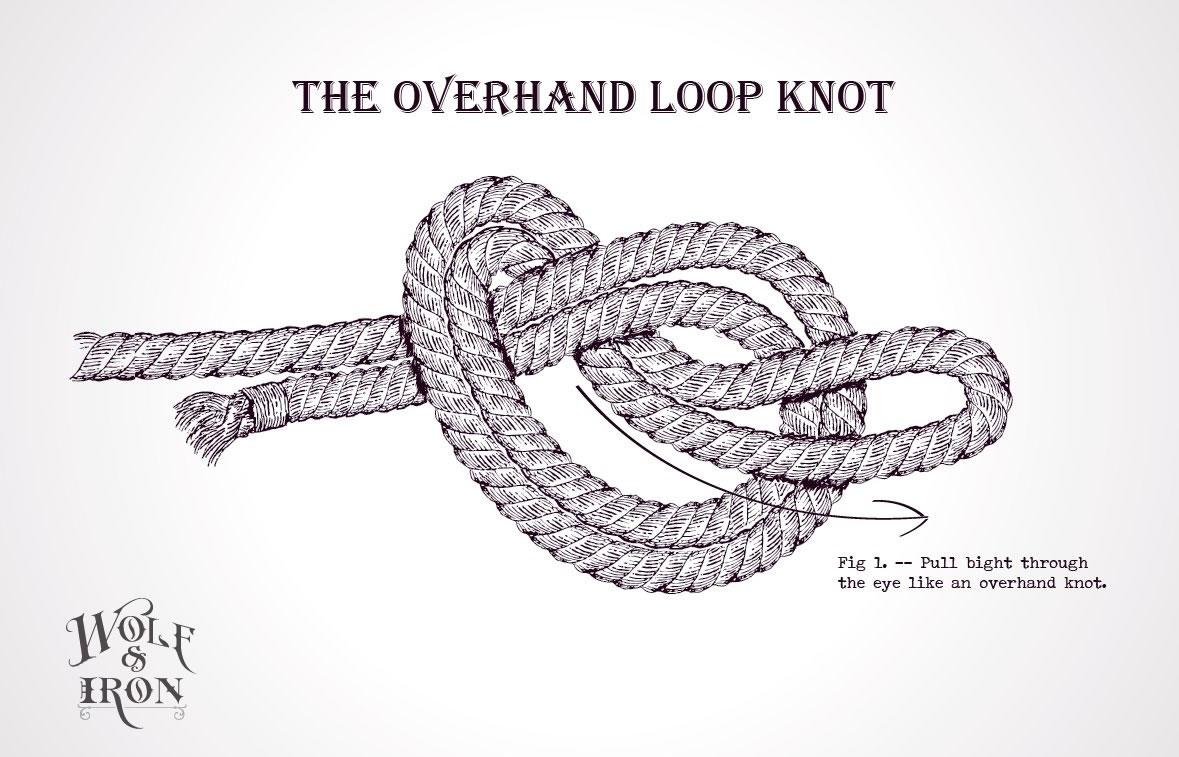
Overhand Loop Knot
The second knot is a variant of the overhand knot. The boys learned the over hand knot as tigers, and this is just tieing an overhand knot on a piece of string that’s doubled over, called a bight in knot tieing lingo. It’s called an overhand knot on a bight, or an overhand loop knot. It forms a non slipping loop on the end of a line.
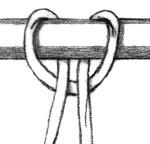
The Larks head.
Ok, I cheated, the boys have never learned the larks head knot, but look at the picture, it’s so simple
The boys will easily learn it, and it allows us to use the Tenkara style of connecting fishing line to a pole which removes the needs for more parts. I’ll teach the boys to tie it step by step later in the document
Step by step instructions
Step 1 Determine which is the handle end and the tip.
Large end is the handle, skinny end is the tip. Step over :D
Step 2 – Tie the string to the handle end with 5 wraps and a 2 half hitches.
Step 3 – Pull the knot tight

Step 4 - Wrap the knot we just tied at the handle end with duct tape, so it never slides or comes untied.
Step 5 – Run the string along to the tip.
Along the way, especially if your pole is bent, you should wrap the string with duct tape to keep it near the pole.
This will keep it from tangling and being annoying.
In case you wonder why we are running the string along the whole length of the pole, this is so that if you catch a fish big enough to break the pole, you can still land the fish.
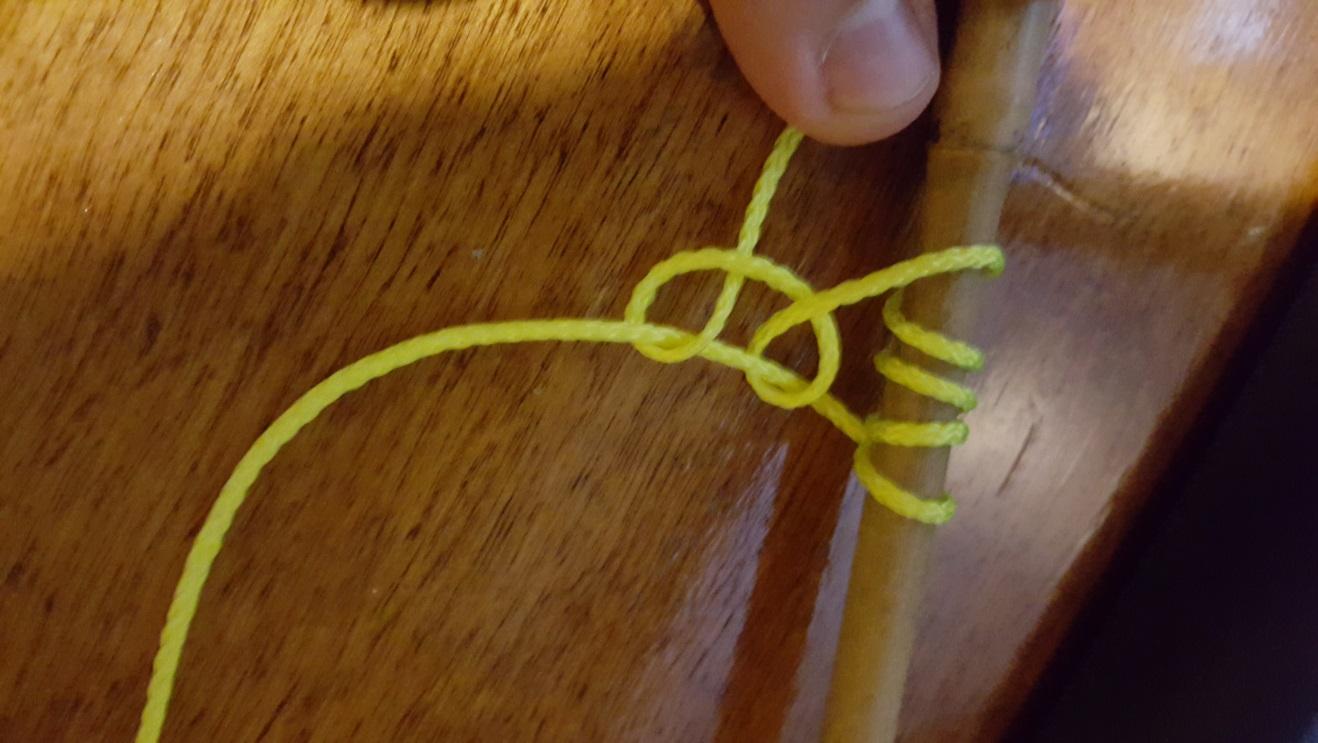
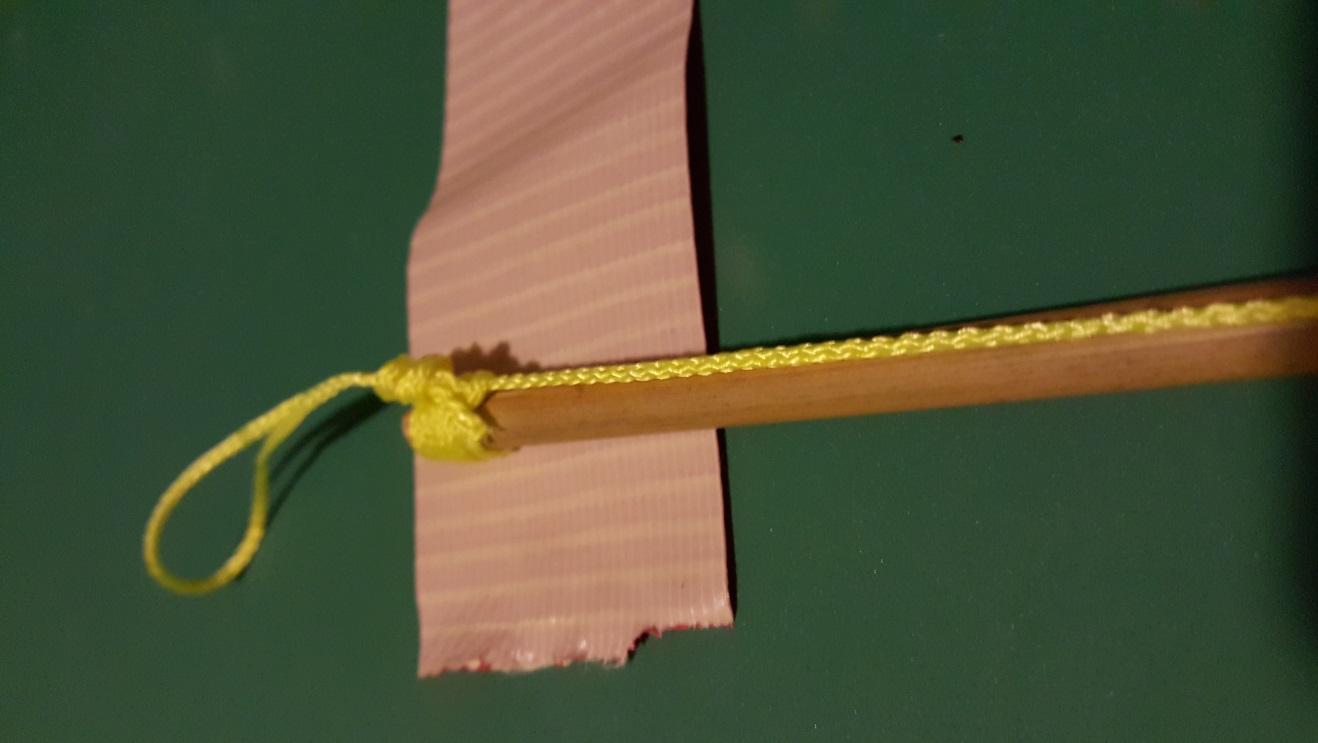
Step 6 – At the far tip, we wrap it again
Like at the bottom we are going to wrap it 5 times and tie a two half hitches, but unlike at the bottom we have to run the string up to the end, then go back down to wrap it. If we don’t’ do this the knot will not hold till we tape it.
Up and back, and start to wrap

After you wrap, tie a two half hitches on the end that goes back to the tip

Another angle
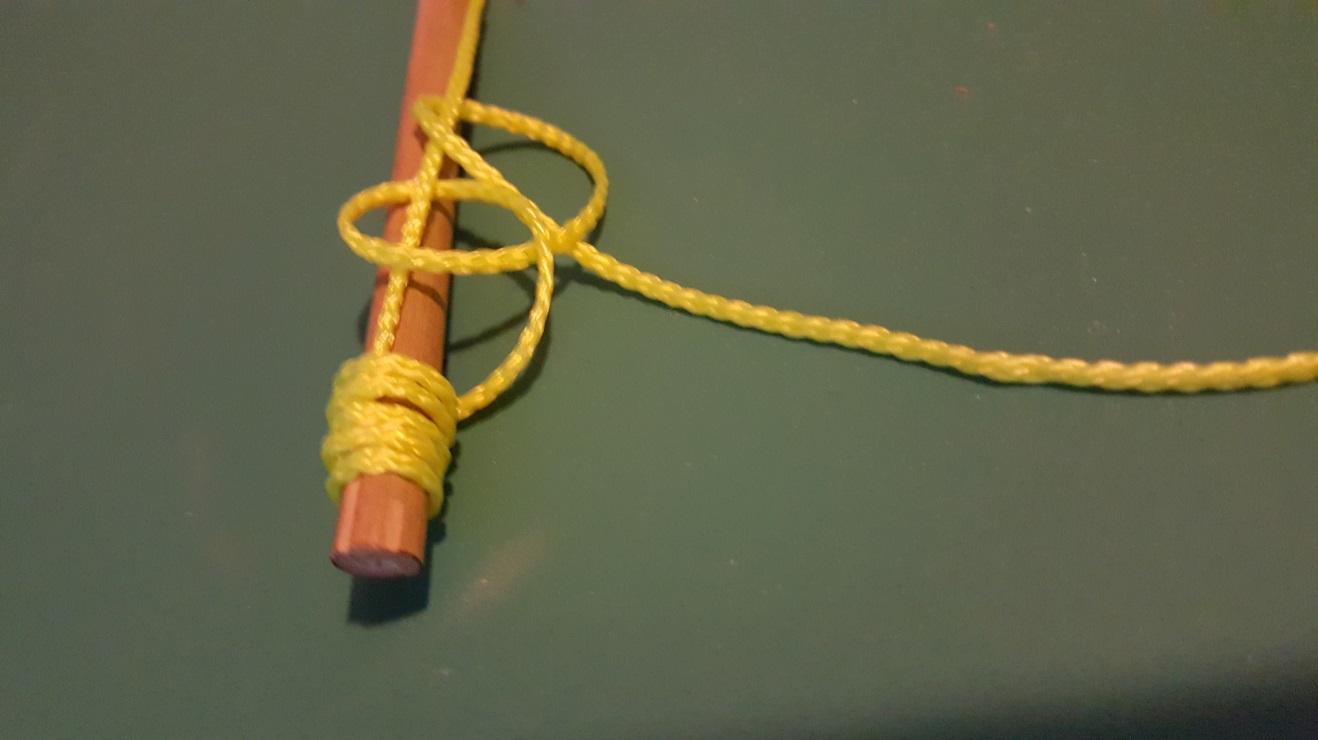
Pull it tight

Then Cut the string with about a foot to a foot and a half left over.
(no pic here)
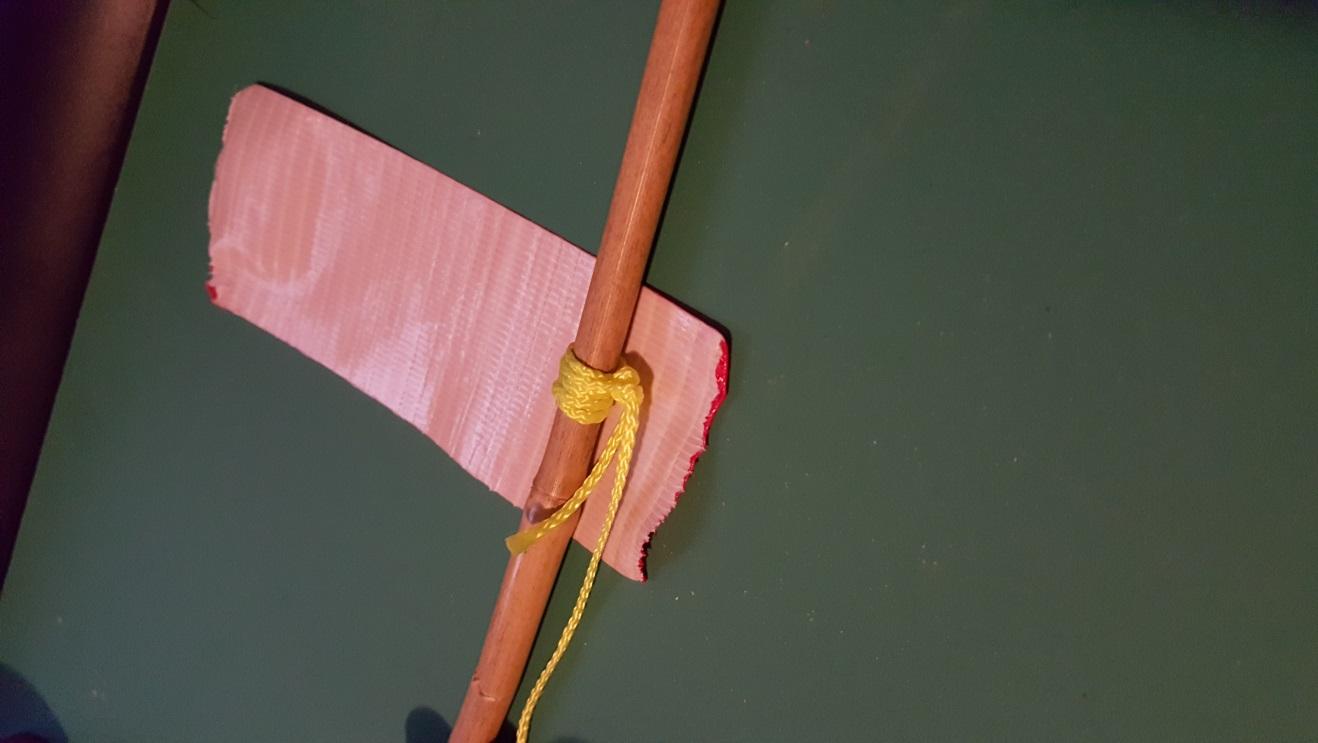
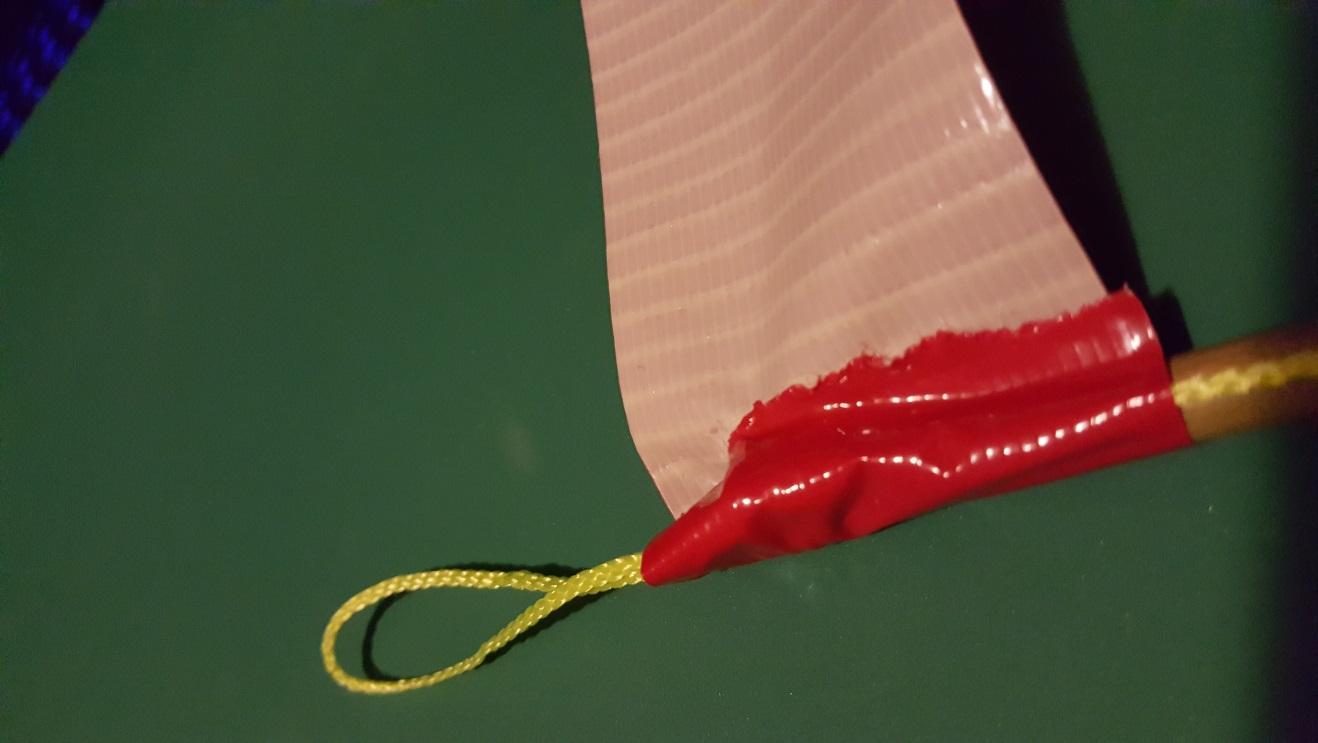
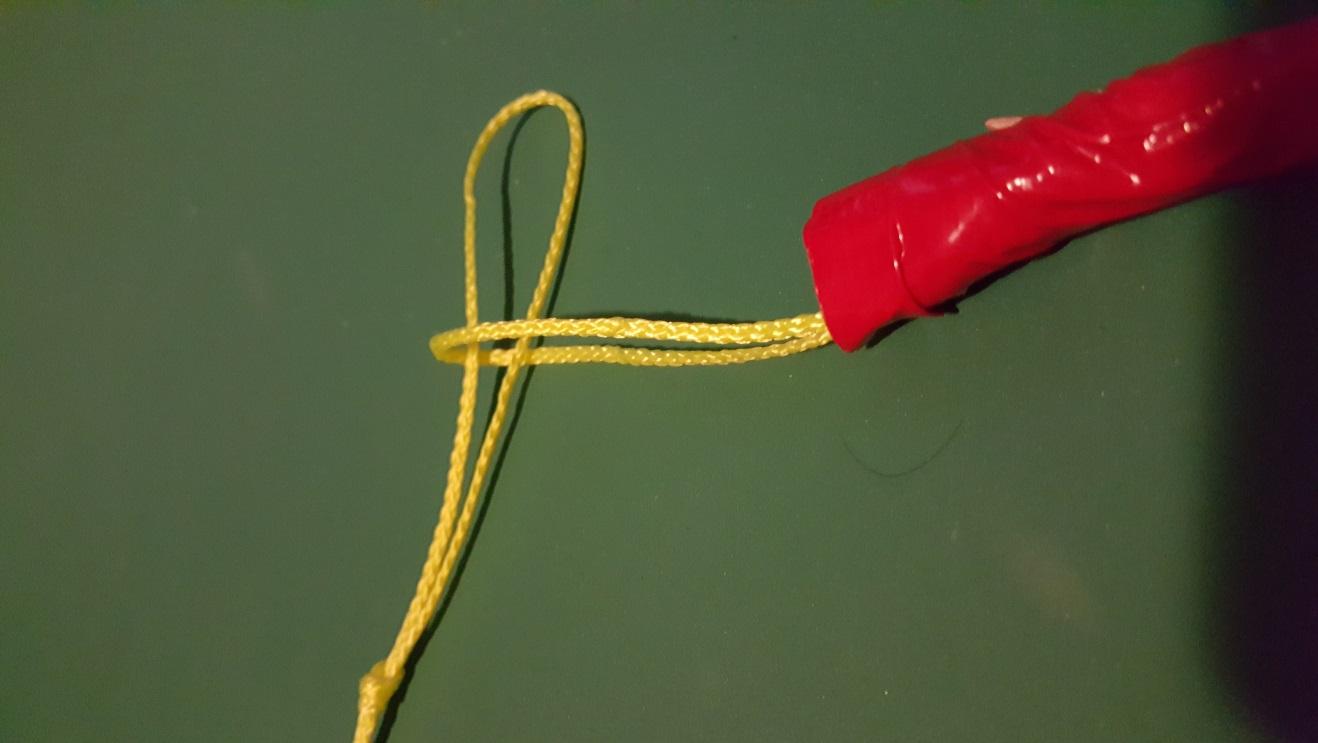
Step 7 - Put a loop on the end of the pole
Here we tie the overhand loop knot.
Fold the string over, tie an overhand knot.
Note that I didn’t have a foot of string here in this picture; it’s easier to tie with extra string then cut the string after you are done
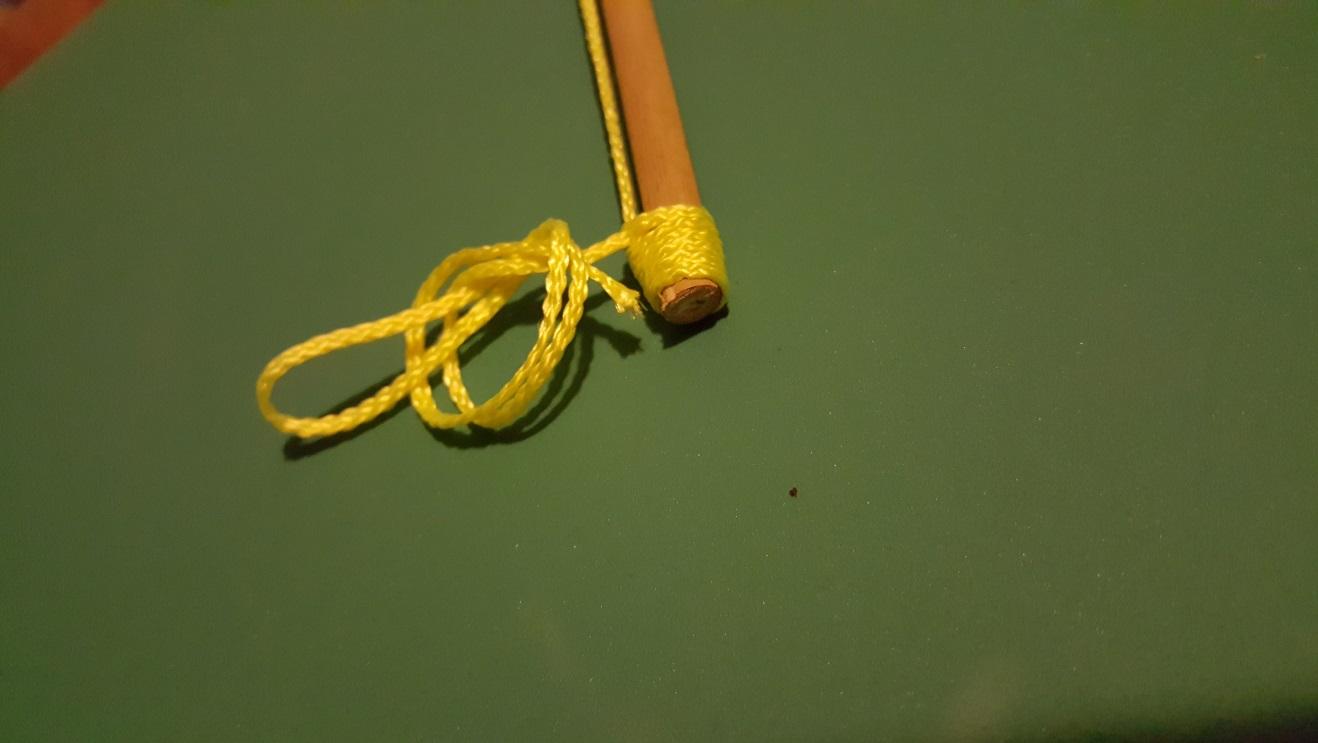
Pull it tight
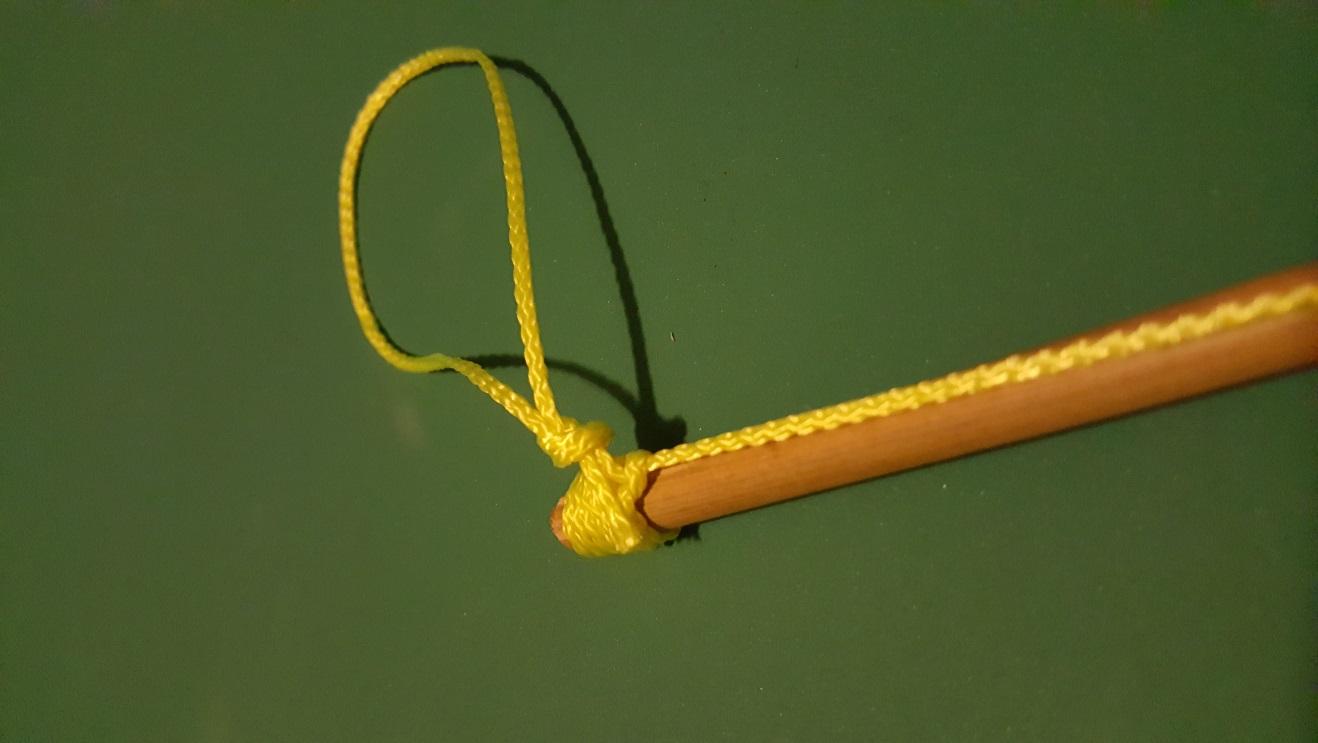
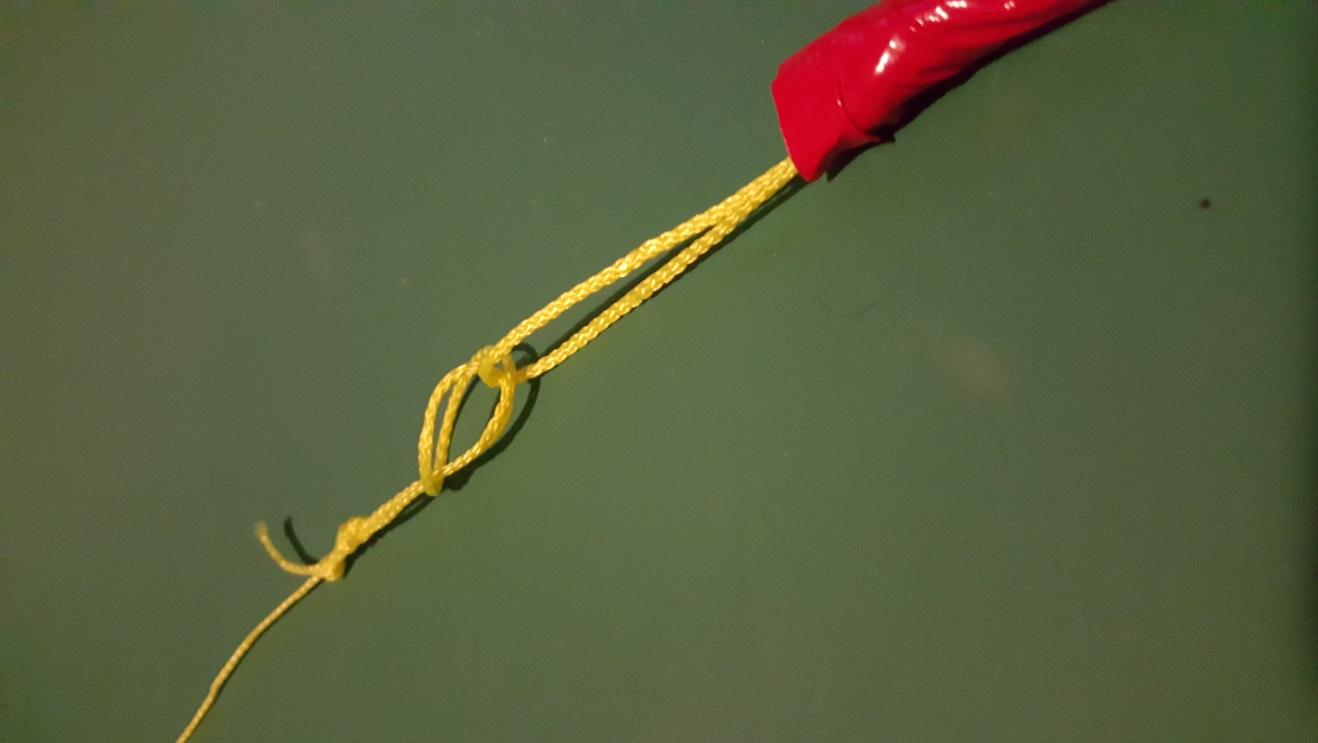
Step 8 – Tie a second overhand loop knot right next to the first.
You might not need this, but I’m paranoid and don’t want to lose a fish, this way there should be no slipping of the knots are tight
Make sure they both are good and tight, this is the biggest weak spot in this design, if this loop comes undone, no fishy.
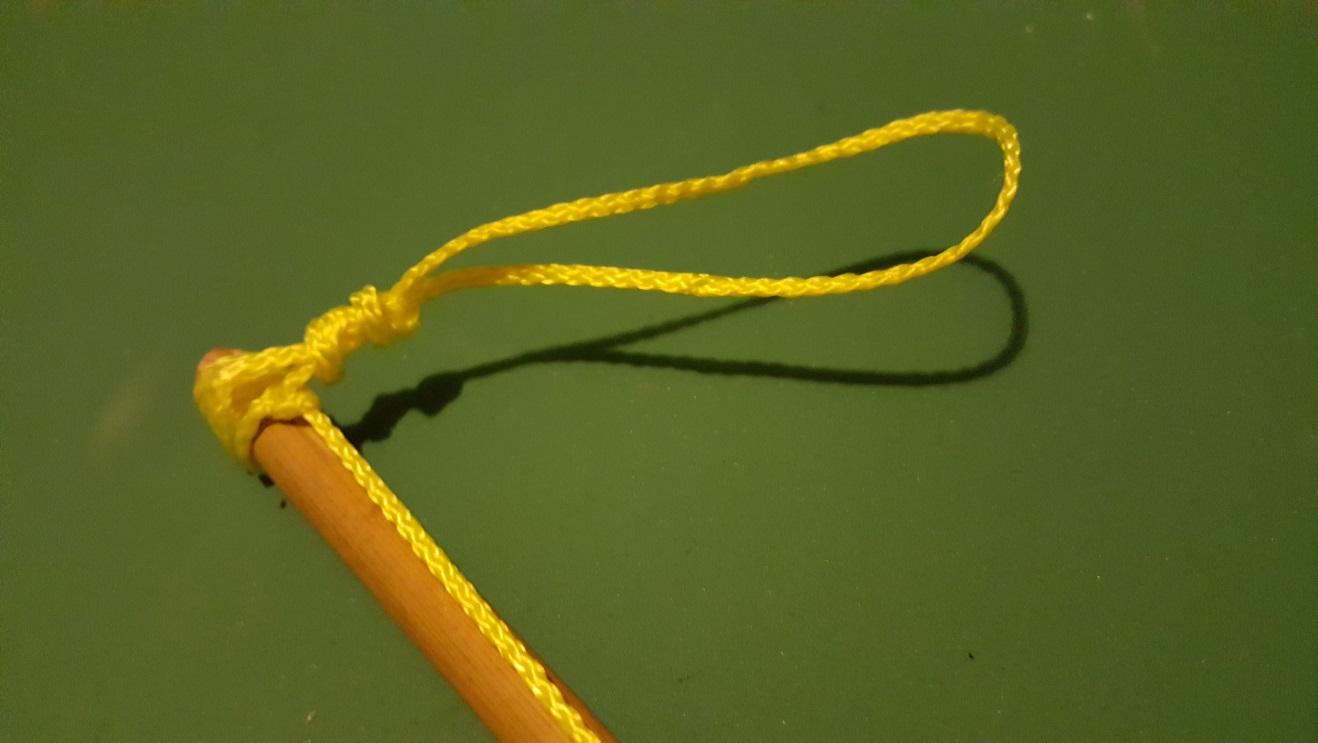
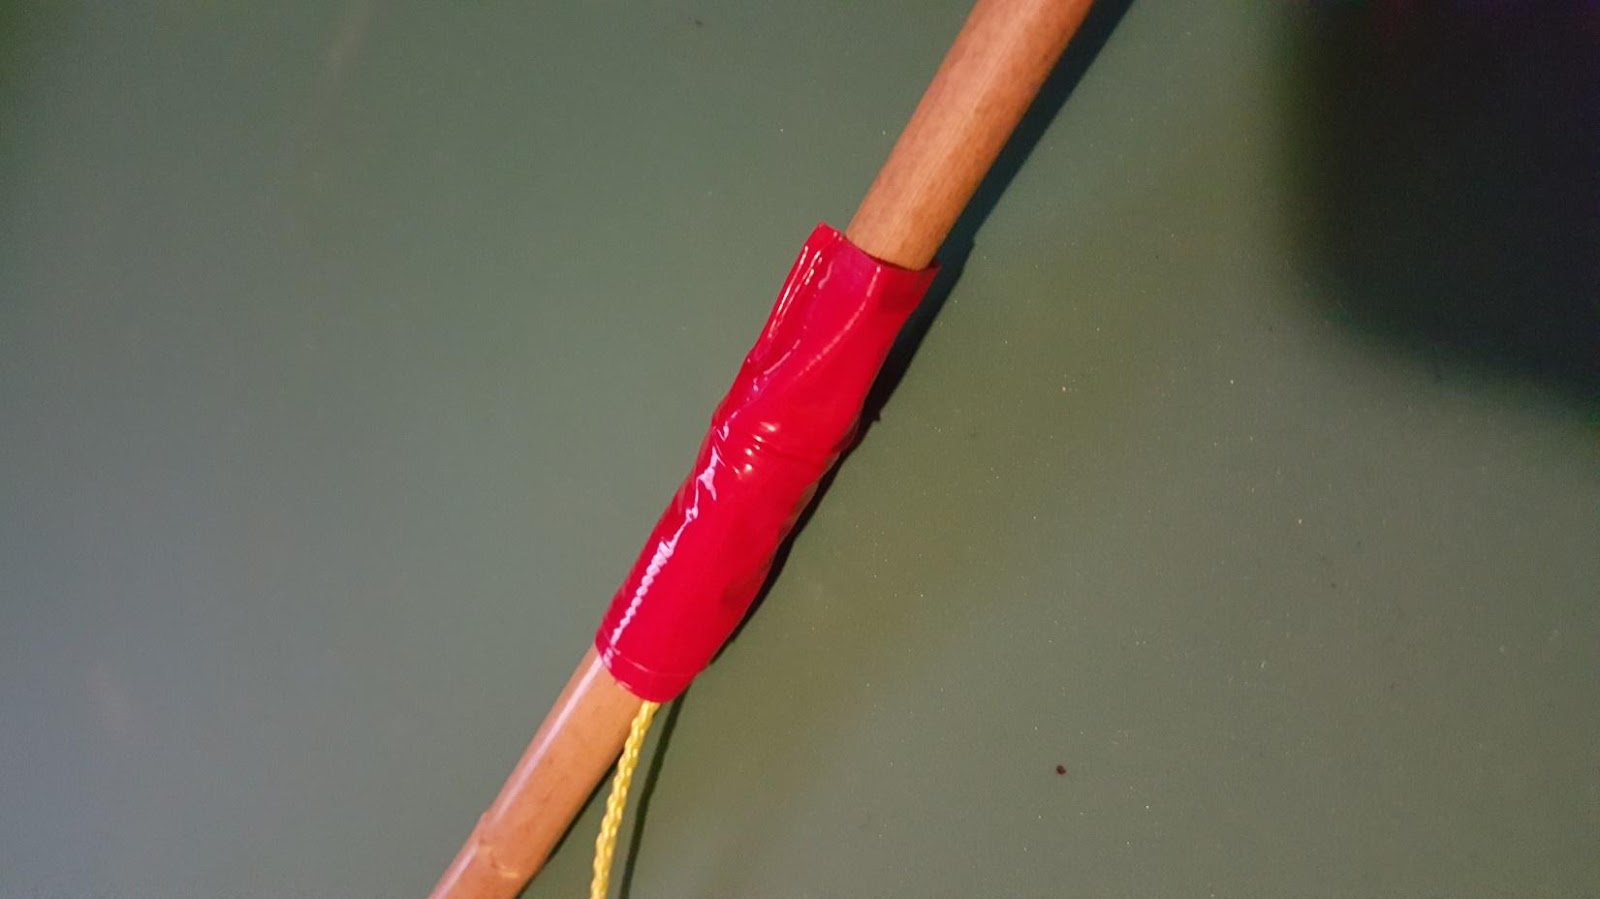
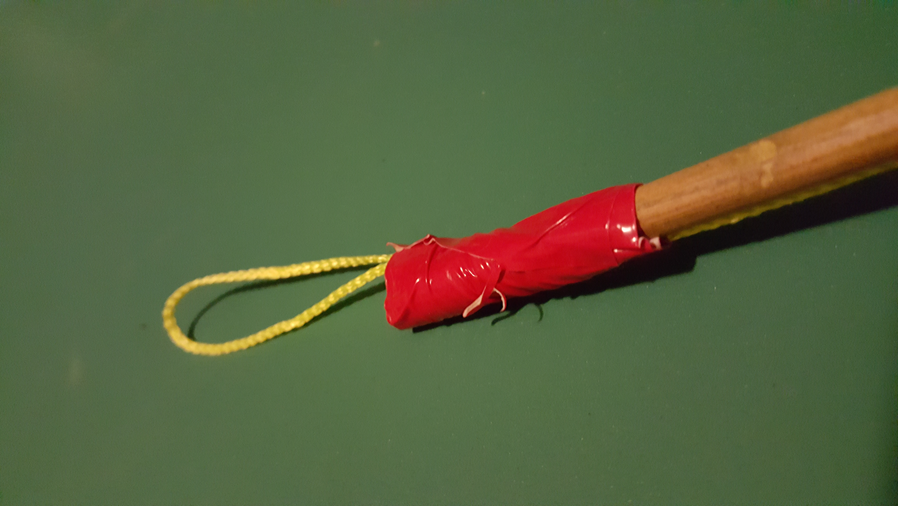
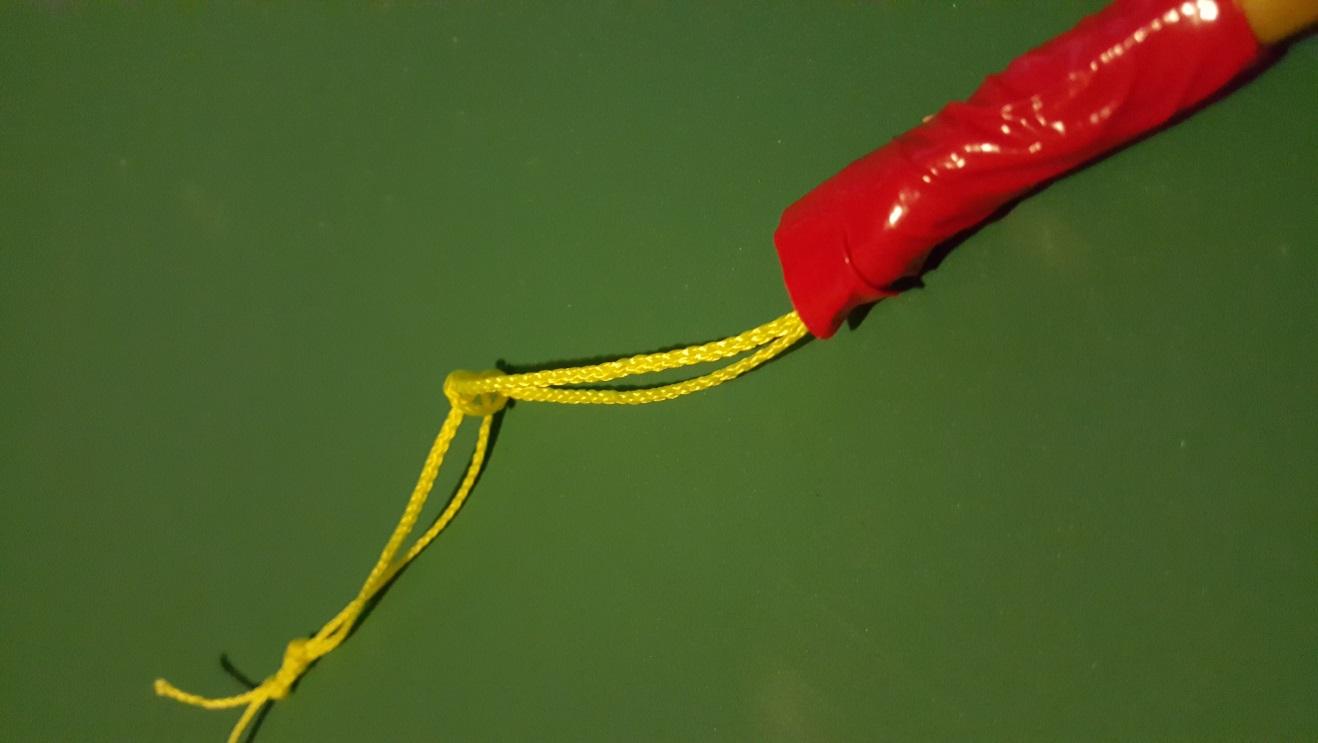
Step 9 – Wrap it in duct tape, so the knots will not move or come untied.
I should have show you before, but here’s the trick to wrapping it
Fold a flap over.
Wrap it tightly.
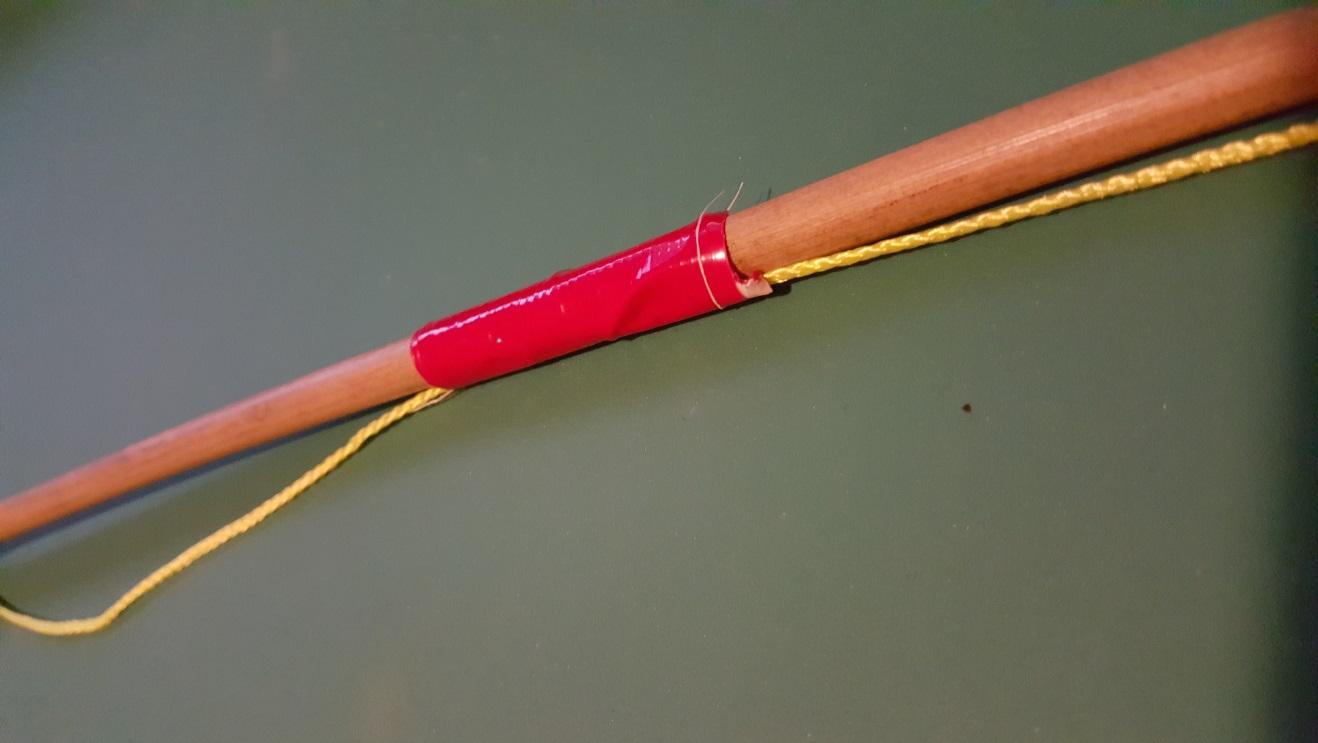
At this point the fishing pole is “done” but you can’t fish with it yet, we’re going to use this loop to attach the string via a larks head knot. The cool thing about this is , it’s really easy to remove it and put a different sting on if this one breaks, knots or you need to cut it.. just unloop it. So let’s tie a piece of line to the pole
Step 10 – Attaching a fishing line
Cut a piece of fishing line. In this document I’m using more masons twine so you can see what I’m doing. In real life I’m using spiderwire high strength fishing line. This is a ridiculous strength of line, 10 lb monofilament line would work great, I’m just a fan of too much is just enough strength, so I use the strong stuff.
Use whatever you can afford. A 10lb fish will probably break these thin bamboo poles, but hey, I’m weird that way.. so strong stuff it is.
Tie a double overhand in the fishing line, just like we did on the end of the pole to form a string non slipping loop. Pull hard on the loop to test if its going to slip, if it slips go online and find a fancy fishing knot.. this worked ok on my spider wire.
You can make your fishing line as long or as short as you want, but I recommend having the line about as long as the pole.
The cool thing about this larks head system is you can change it later easily.
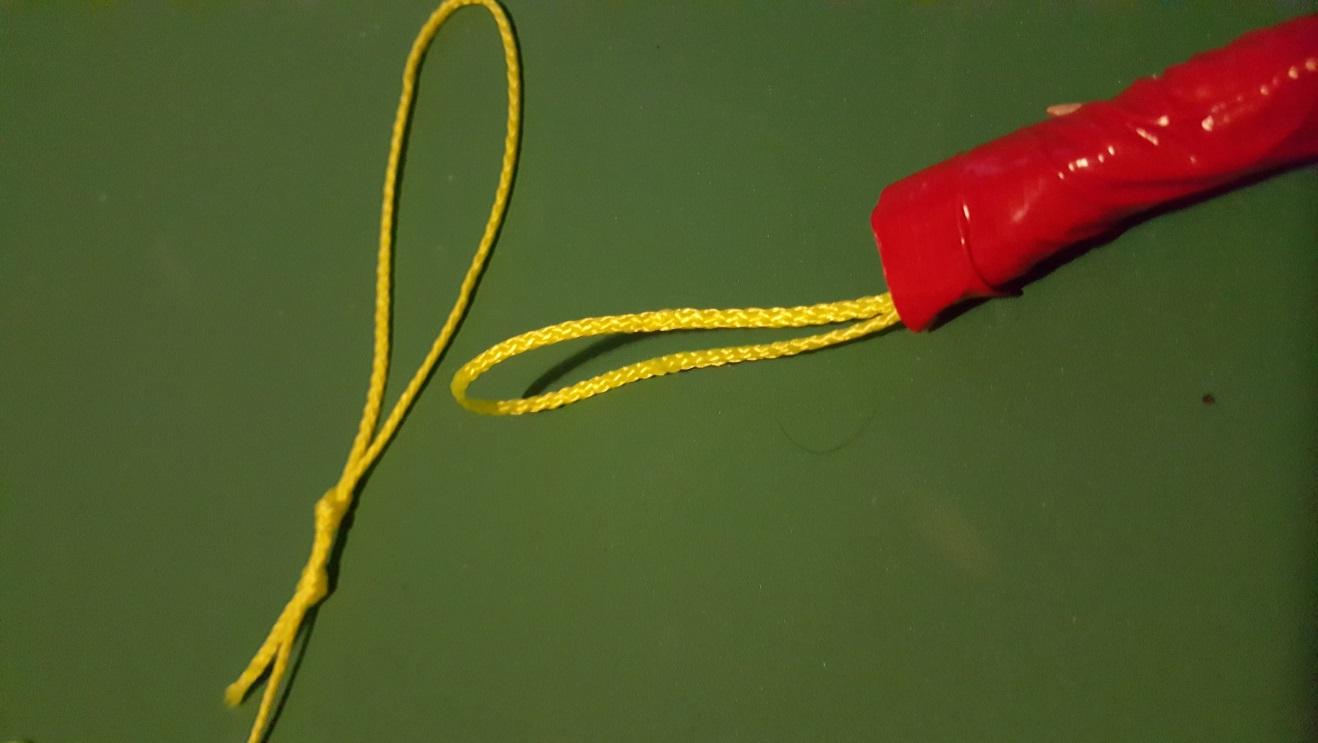
Now to tie the larks head, slip the fishing line loop up through the loop on then end of the pole.
Take then other end of the fishing line and tuck it through the loop on the fishing line

Pull the end of the line to tighten the knot
Pull it tight
Now put whatever you want on the other end of the line. I put a snap swivel so I can change out my hooks. You could put another larks head and go all primitive, to save money just remember to put a leader on anything so the larks head can't come undone.
I put a snap swivel, with a # 4 hook on it, a pinch weight to pull the hook down and about 12” up from the snap swivel I put a bobber. For panfish (sunfish bluegill etc), what you’ll be catching most of the time as close to the shore as this pole will go, put the hook about halfway to the bottom…by adjusting the bobber further and closer to the snap swivel.
Here is the finished pole with mason's line instead of fishing line (same pic as at the beginning of the document)
Once you know how to tie the knots you can make a pole like this in a few minutes, easily…
I recommend you practice the knots a few times and then make one ahead of your meeting, so you will know how to help the boys/ parent teams get it done.
NOTE: with a 6' pole I had to put a double length(12') of line to get out where the bluegill were... something to be aware of (you can just toss the end out with your other hand, like a hobo rig (which I'd have much rather taught the boys to make than a fishing pole.)).
NOTE: with a 6' pole I had to put a double length(12') of line to get out where the bluegill were... something to be aware of (you can just toss the end out with your other hand, like a hobo rig (which I'd have much rather taught the boys to make than a fishing pole.)).