htmHeader


BSA Updated Easier Requirements for 2016!!!

The number of requirements you need has changed, all the activities on this blog are still good, they just changed how many you need to do and some slight wording changes. but please check the new Requirements above to be sure you don't do unneeded work.


Shortcuts:
Bear Reqs. Webelos 1 Reqs. Webelos & Arrow Of Light Electives Arrow Of Light Reqs. Miscellaneous

Wednesday, April 20, 2016

A Super Simple Bear Scout Fishing pole

A Super Simple (and cheap) Bear scout Fishing pole
for the “A Bear Goes Fishing” Belt loop

By Eric W. Brown


Goals of this document:

  • The primary goal is to show how to make a simple fishing pole to meet the Belt loop requirements, using only knots the boy have learned up to and including the Bear year.
  • I’d like it to be inexpensive and the parts to be easy to source.
  • I’d like it to be easy enough for a scout to build with the assistance of a parent, in a short amount of time.
In short, I want you to be able to make one of these…
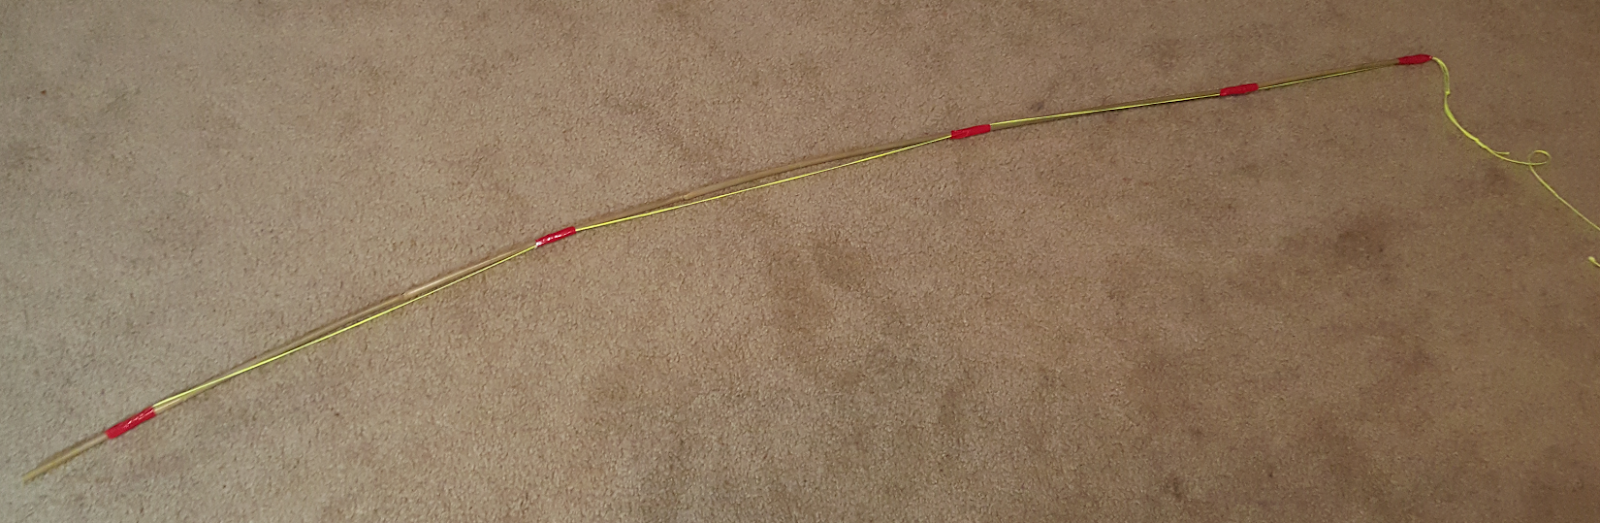


Parts:


A 6 foot pole
Masons Twine (really any strong braided twine will do)
Duct tape

Fishing line + any tackle you want to put on it.

Really that’s it… it’s that simple;

This design rips off idea from a lot of sources, including a Japanese fishing tradtition called tenkara, which eliminates a lot of the parts required from the fishing pole, replacing it with a loop.

Parts Sourcing:

6’ Bamboo Pole, or 6’ PVC pipe.
The thin bamboo poles used in this tutorial are available in the garden section at Home Depot. You get 6 poles for about $4 at the time of this writing.

They are used as garden stakes.. They are pretty thin, so if you want the poles to last longer, you can use PVC pipe, or ½” bamboo poles that you can buy on Homedepot.com for about $20 for 25 of them (but you have to have them shipped to you)


Knots Used:

2 Half Hitches:

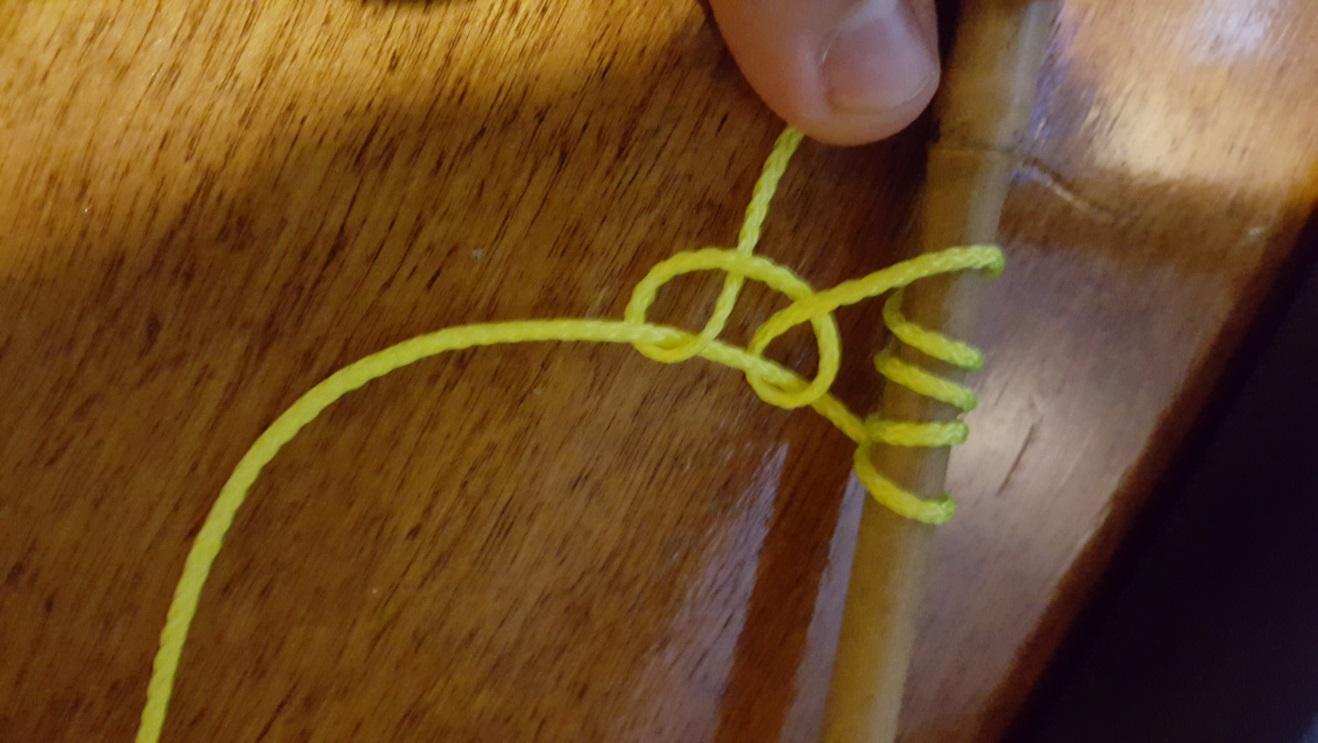
The first knot we are going to use is the 2 half hitches, which the boys learned this year. Just like in the picture we are going to wrap it around the pole extra times, but we are going to wrap if 5 or 6 times, then tie the knot.
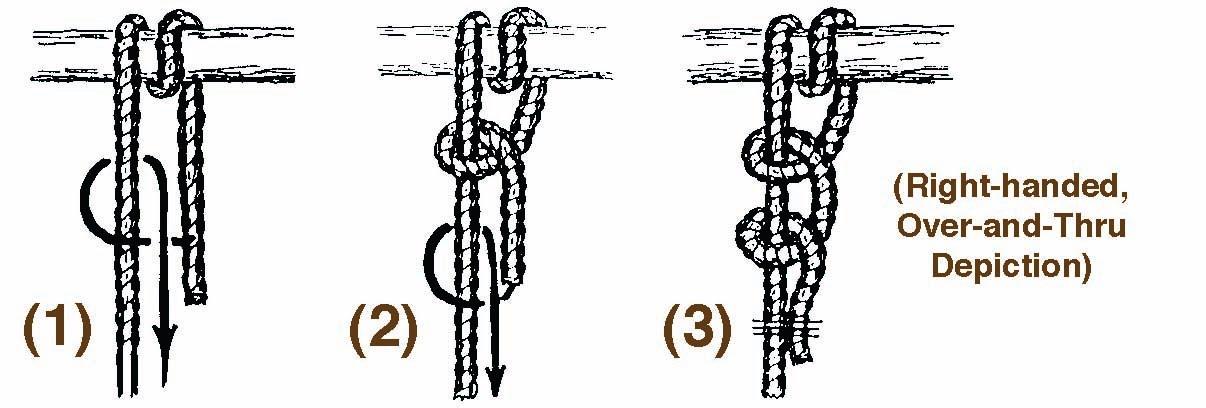
https://scoutpioneering.files.wordpress.com/2013/02/roundturn-2-half-drawing.jpg

Overhand Loop Knot

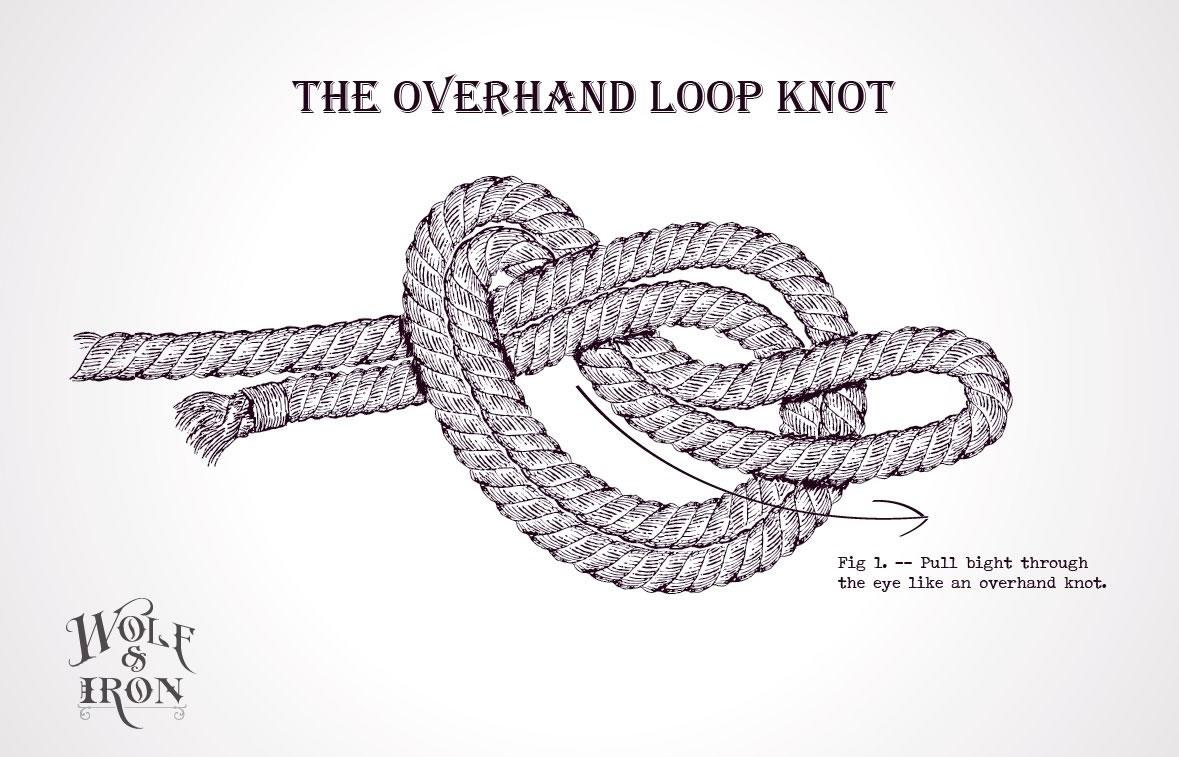
The second knot is a variant of the overhand knot. The boys learned the over hand knot as tigers, and this is just tieing an overhand knot on a piece of string that’s doubled over, called a bight in knot tieing lingo. It’s called an overhand knot on a bight, or an overhand loop knot. It forms a non slipping loop on the end of a line.
http://wolfandiron.com/wp-content/uploads/2013/12/Overhand-Loop-Knot-Illustration-Vintage-2.jpg


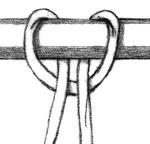
The Larks head.


Ok, I cheated, the boys have never learned the larks head knot, but look at the picture, it’s so simple
The boys will easily learn it, and it allows us to use the Tenkara style of connecting fishing line to a pole which removes the needs for more parts. I’ll teach the boys to tie it step by step later in the document
http://eimages.interweave.com/beadingdaily/Kristal/190b-larks-head-knot.jpg

Step by step instructions


Step 1 Determine which is the handle end and the tip.


Large end is the handle, skinny end is the tip. Step over :D

Step 2 – Tie the string to the handle end with 5 wraps and a 2 half hitches.

C:\Users\Eric\Pictures\Scouts\fishing pole\20160417_164409.jpg

Step 3 – Pull the knot tight


C:\Users\Eric\Pictures\Scouts\fishing pole\20160417_164713.jpg


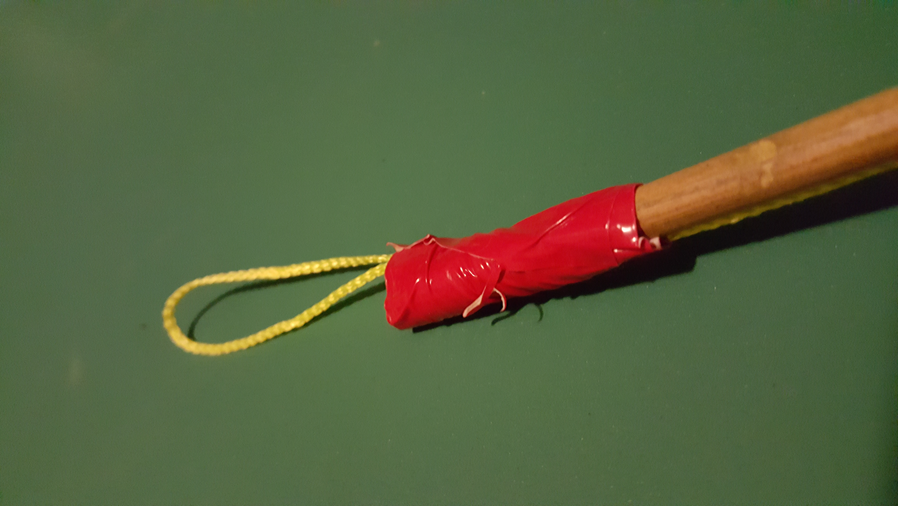
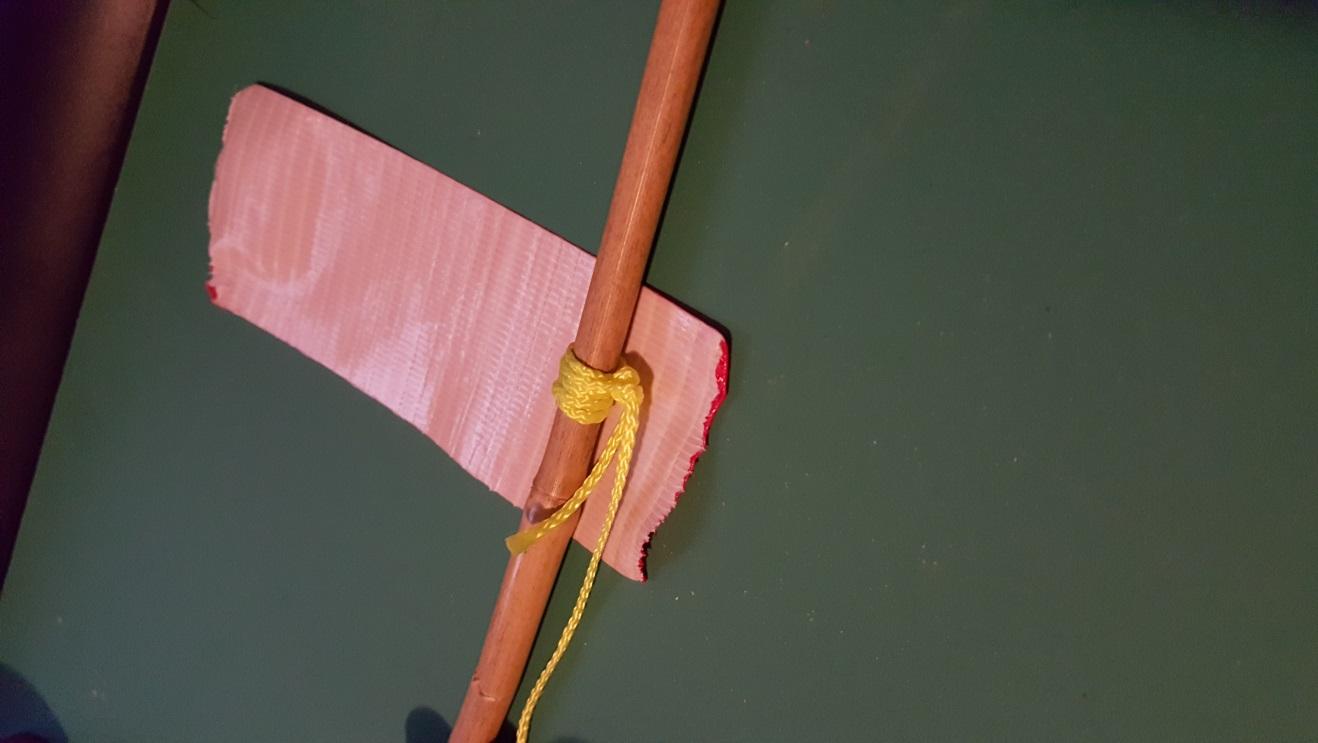
Step 4 - Wrap the knot we just tied at the handle end with duct tape, so it never slides or comes untied.
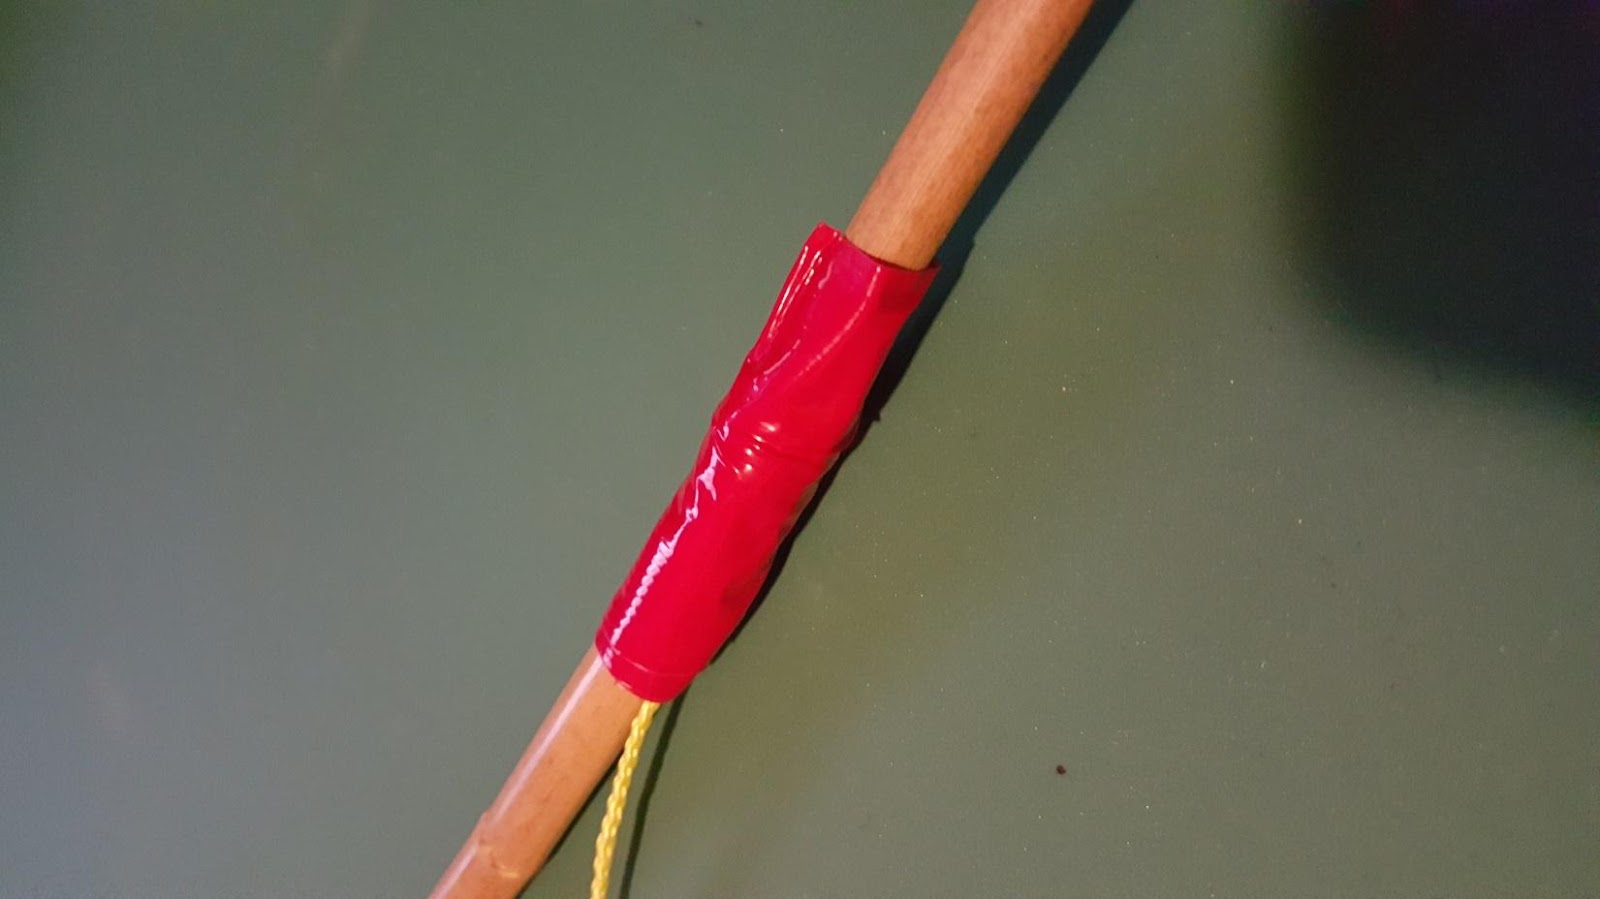
C:\Users\Eric\Pictures\Scouts\fishing pole\20160417_164745.jpg


C:\Users\Eric\AppData\Local\Microsoft\Windows\Temporary Internet Files\Content.Word\20160417_164827.jpg

Step 5 – Run the string along to the tip.


Along the way, especially if your pole is bent, you should wrap the string with duct tape to keep it near the pole.
This will keep it from tangling and being annoying.

In case  you wonder why  we are running the string along the whole length of the pole, this is so that if you catch a fish big enough to break the pole, you can still land the fish.
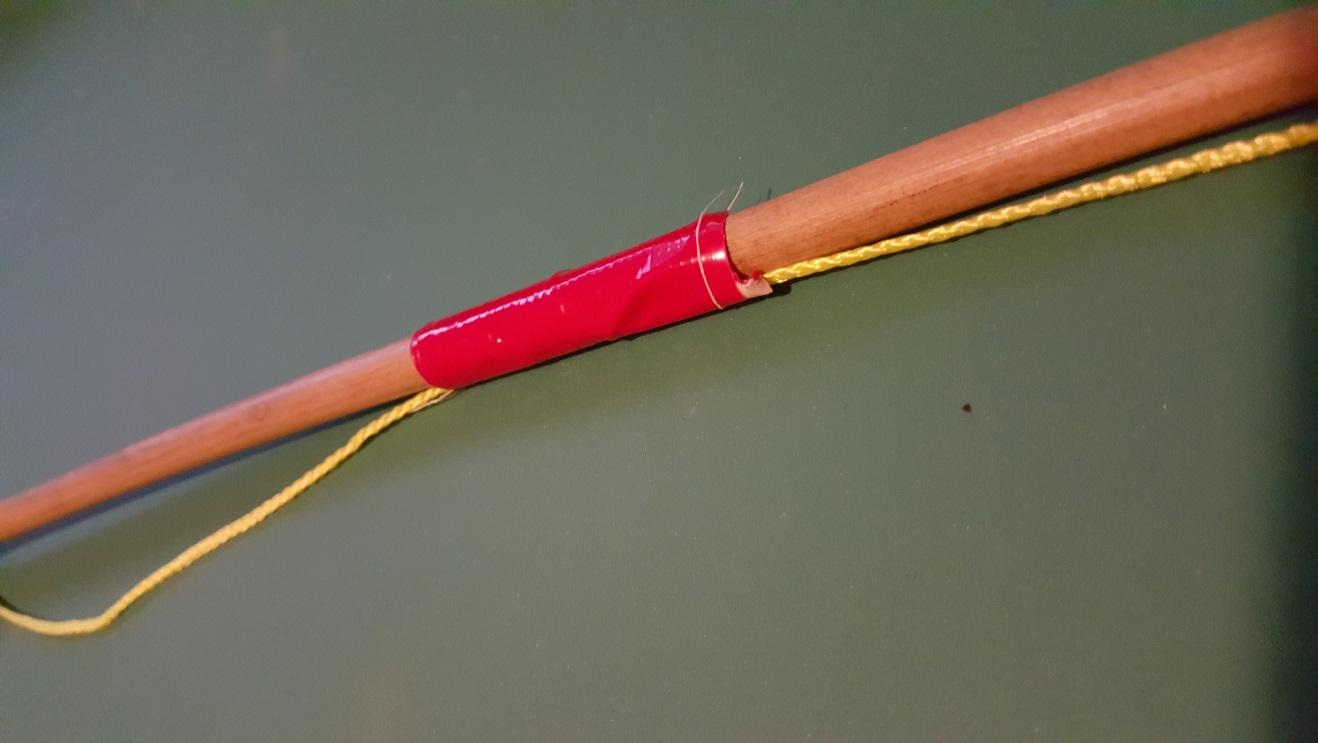
C:\Users\Eric\Pictures\Scouts\fishing pole\20160417_164947.jpg

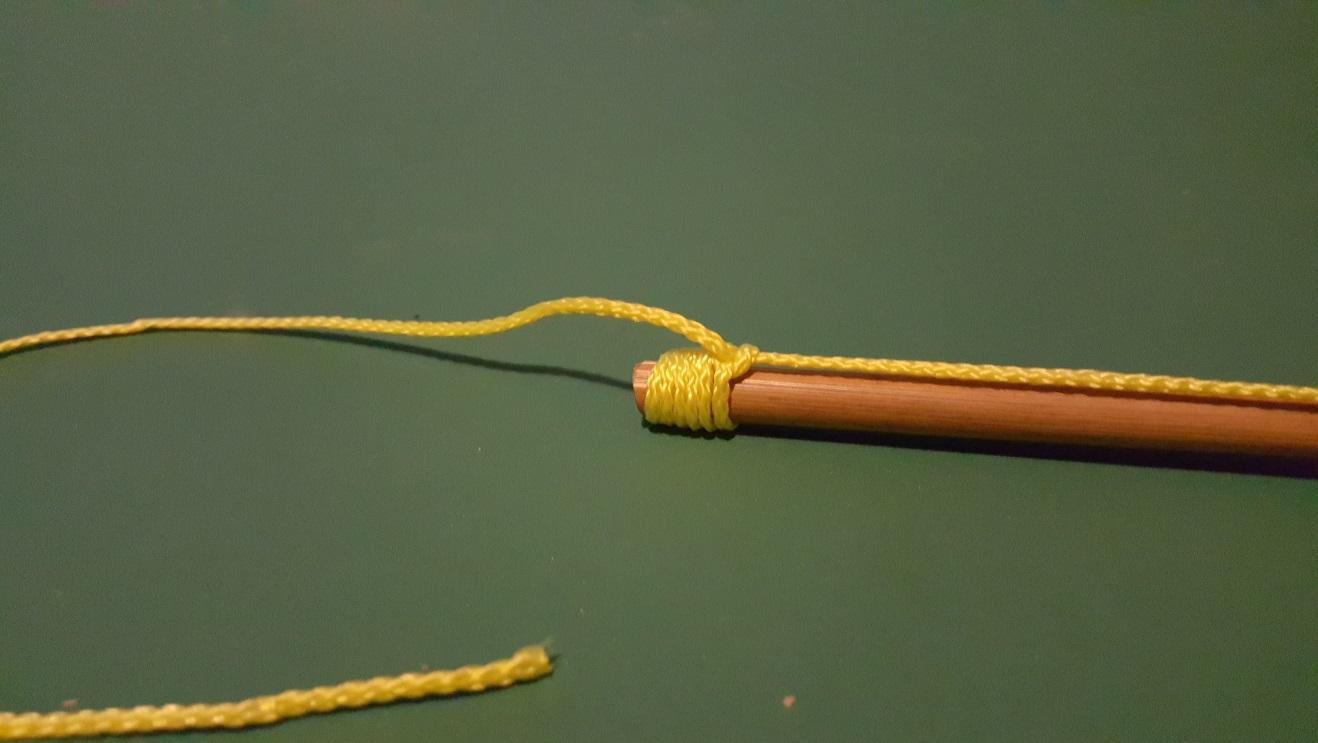
Step 6 – At the far tip, we wrap it again


Like at the bottom we are going to wrap it 5 times and tie a two half hitches, but unlike at the bottom we have to run the string up to the end, then go back down to wrap it. If we don’t’ do this the knot will not hold till we tape it.

Up and back, and start to wrap
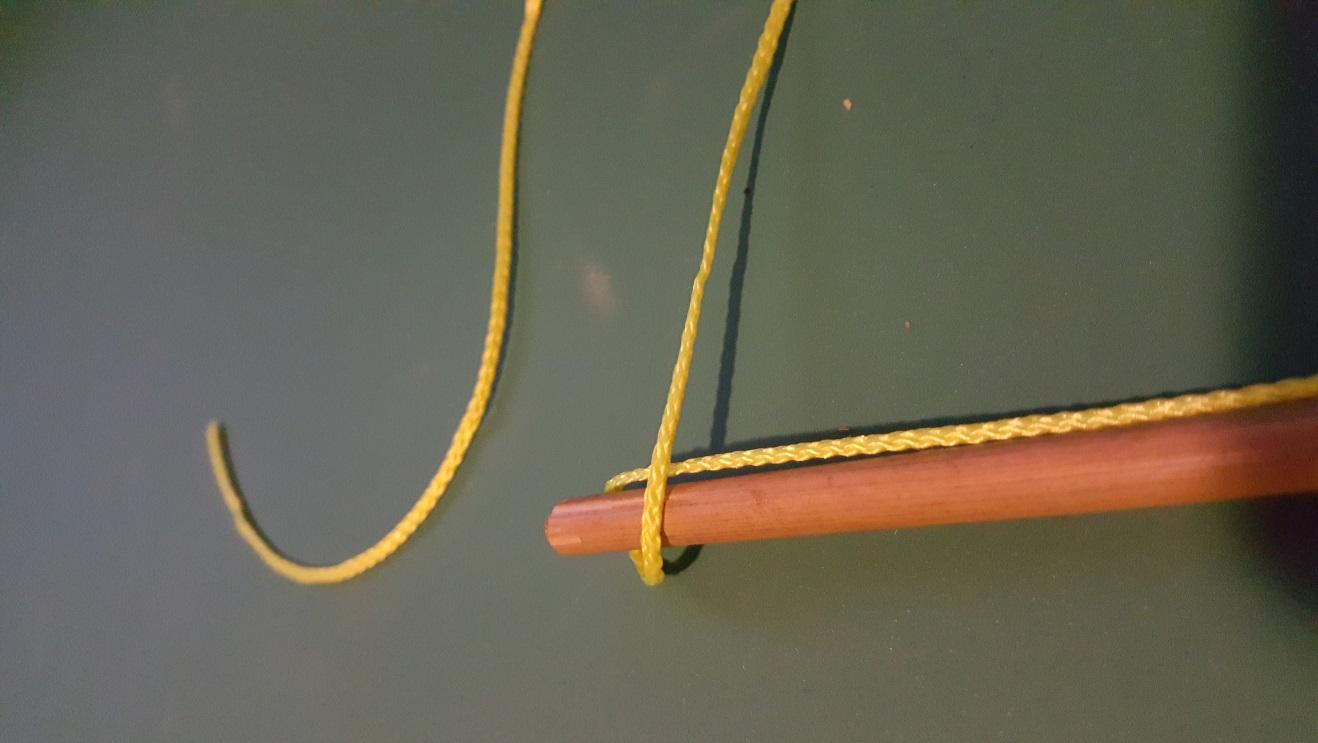
C:\Users\Eric\Pictures\Scouts\fishing pole\20160417_165325.jpg

After you wrap, tie a two half hitches on the end that goes back to the tip
C:\Users\Eric\Pictures\Scouts\fishing pole\20160417_165546.jpg

Another angle

C:\Users\Eric\Pictures\Scouts\fishing pole\20160417_165647_001.jpg

Pull it tight
C:\Users\Eric\Pictures\Scouts\fishing pole\20160417_165844.jpg


Then Cut the string with about a foot to a foot and a half left over.
(no pic here)


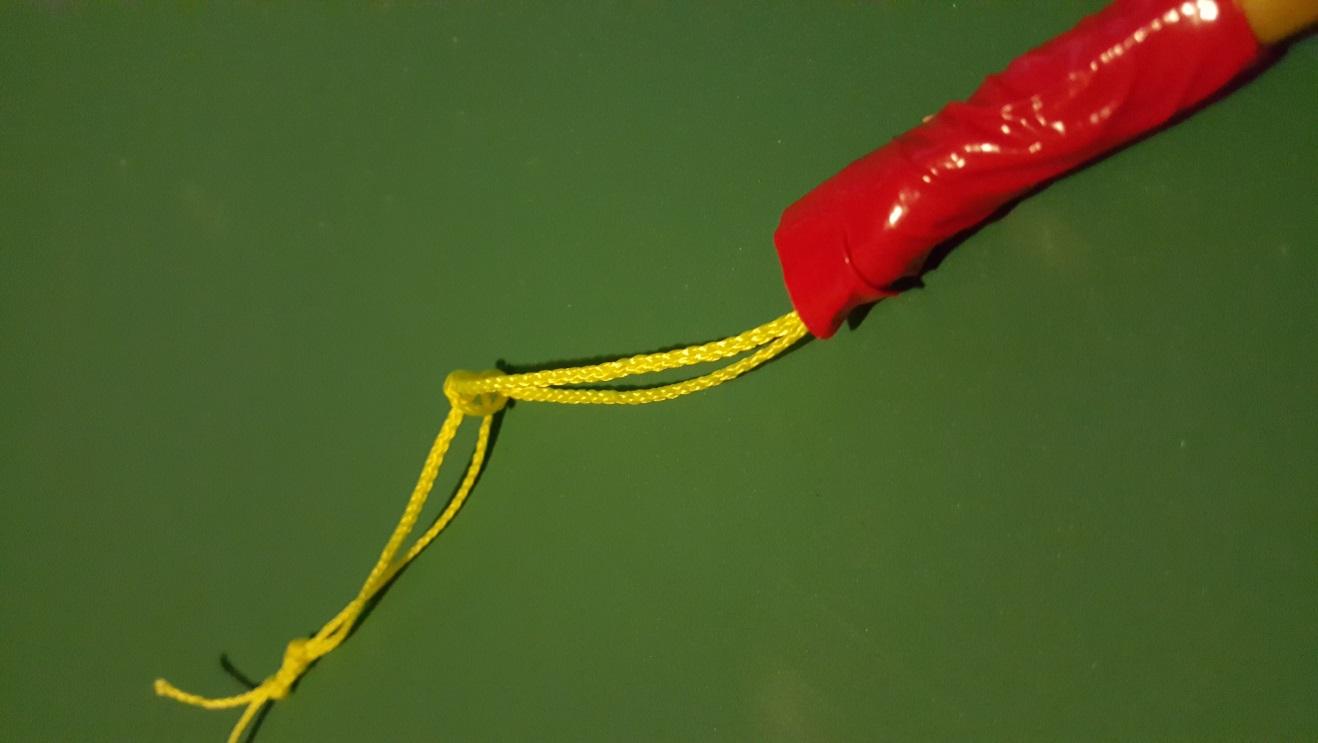
Step 7 - Put a loop on the end of the pole
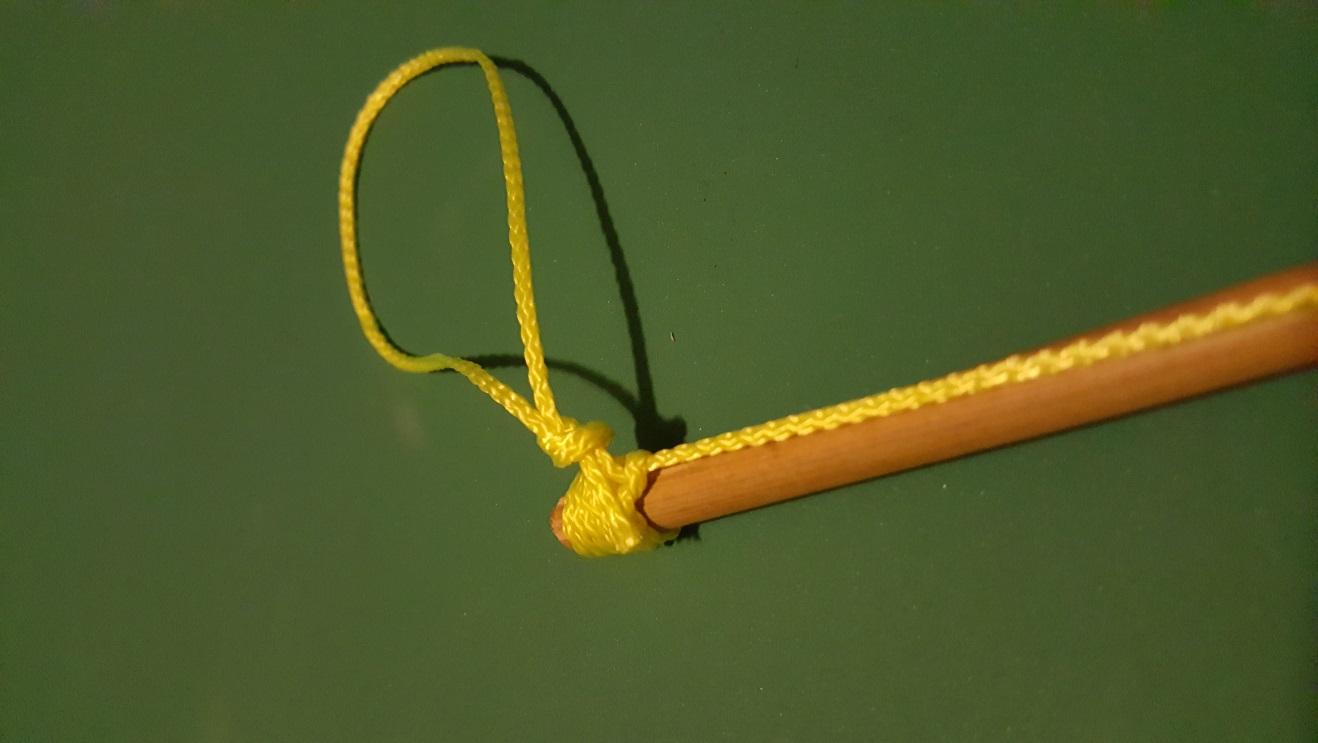
Here we tie the  overhand loop knot.

Fold the string over, tie an overhand knot.

Note that I didn’t have a foot of string here in this picture; it’s easier to tie with extra string then cut the string after you are done
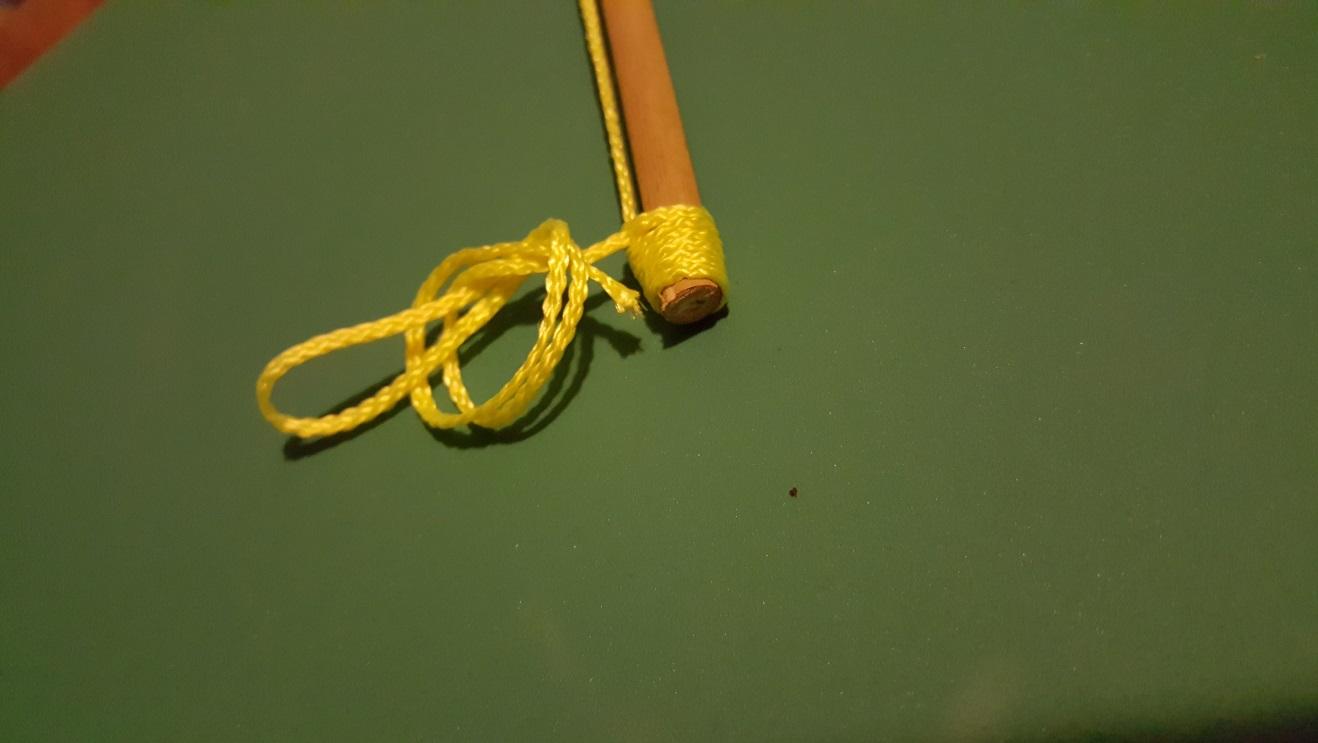
C:\Users\Eric\Pictures\Scouts\fishing pole\20160417_170114.jpg

Pull it tight

C:\Users\Eric\Pictures\Scouts\fishing pole\20160417_170214.jpg


Step 8 – Tie a second overhand loop knot right next to the first.

You might not need this, but I’m paranoid and don’t want to lose a fish, this way there should be no slipping of the knots are tight

Make sure they both are good and tight, this is the biggest weak spot in this design, if this loop comes undone, no fishy.
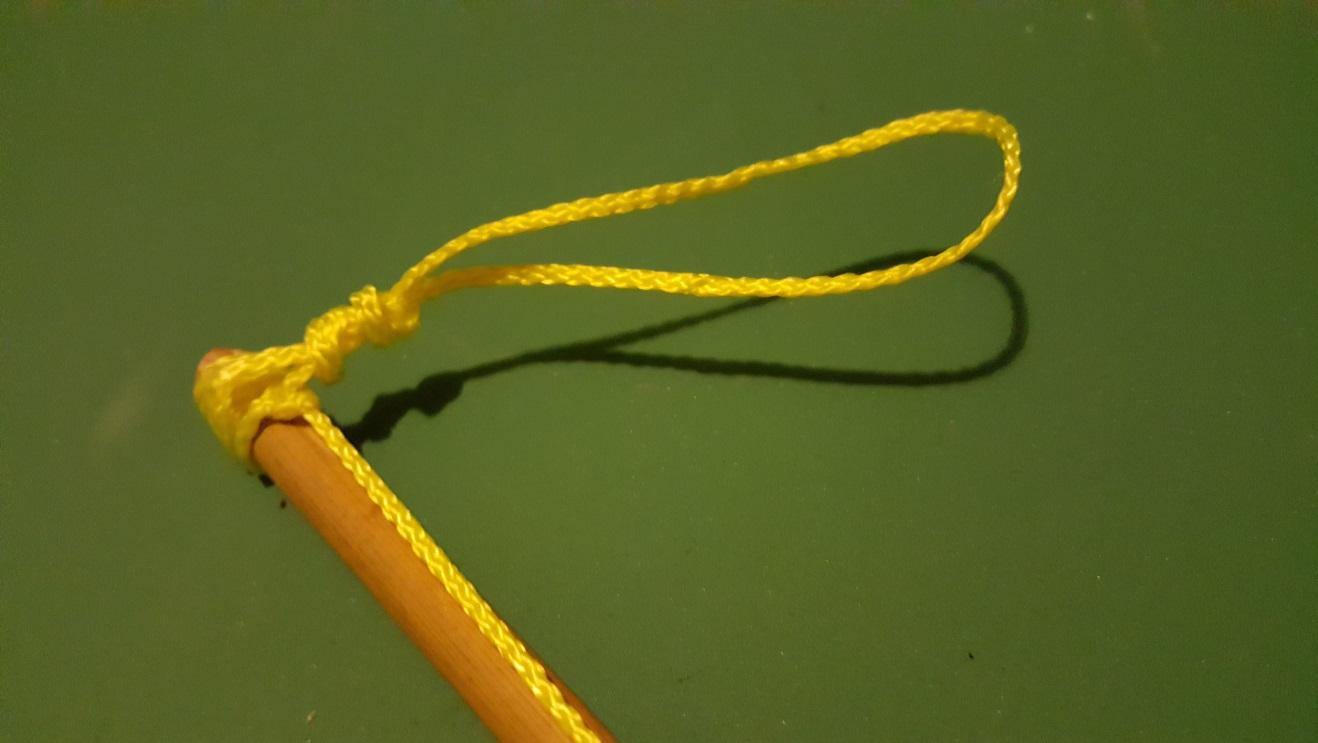
C:\Users\Eric\Pictures\Scouts\fishing pole\20160417_170304.jpg


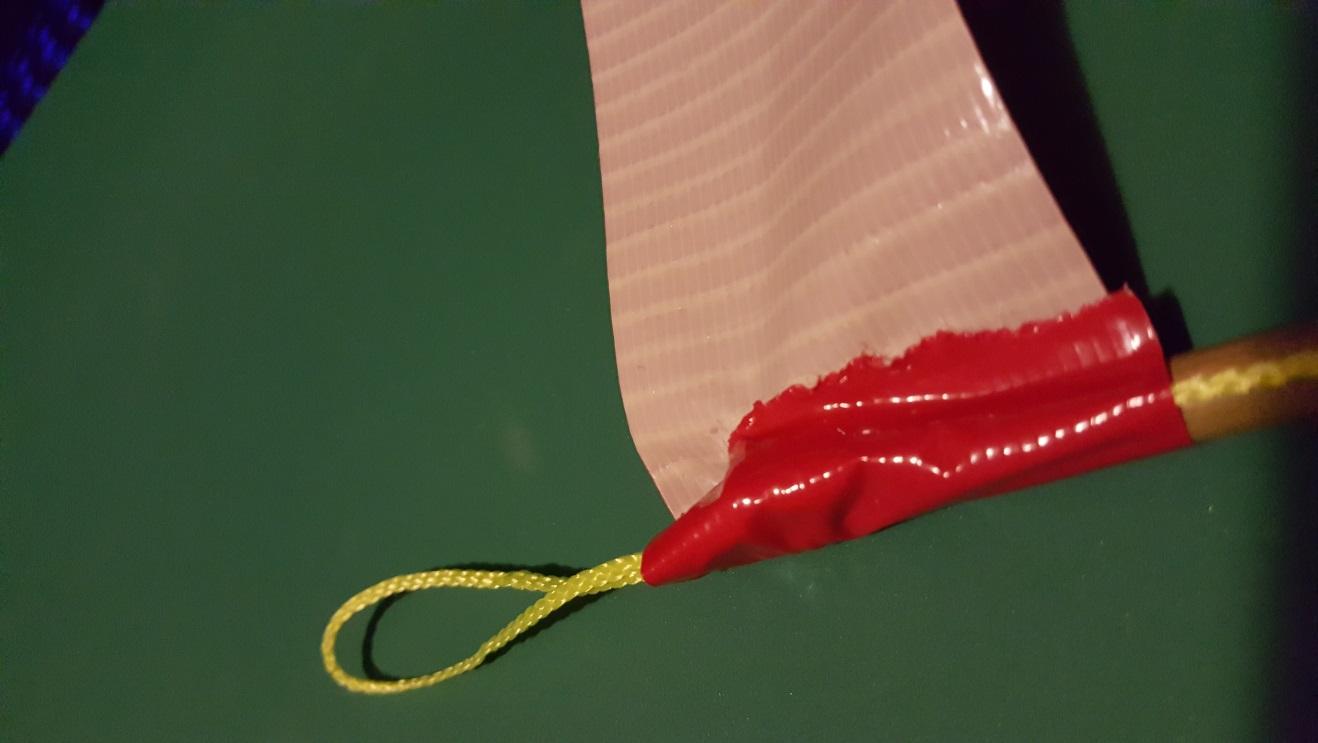
Step 9 – Wrap it in duct tape, so the knots will not move or come untied.

I should have show you before, but here’s the trick to wrapping it
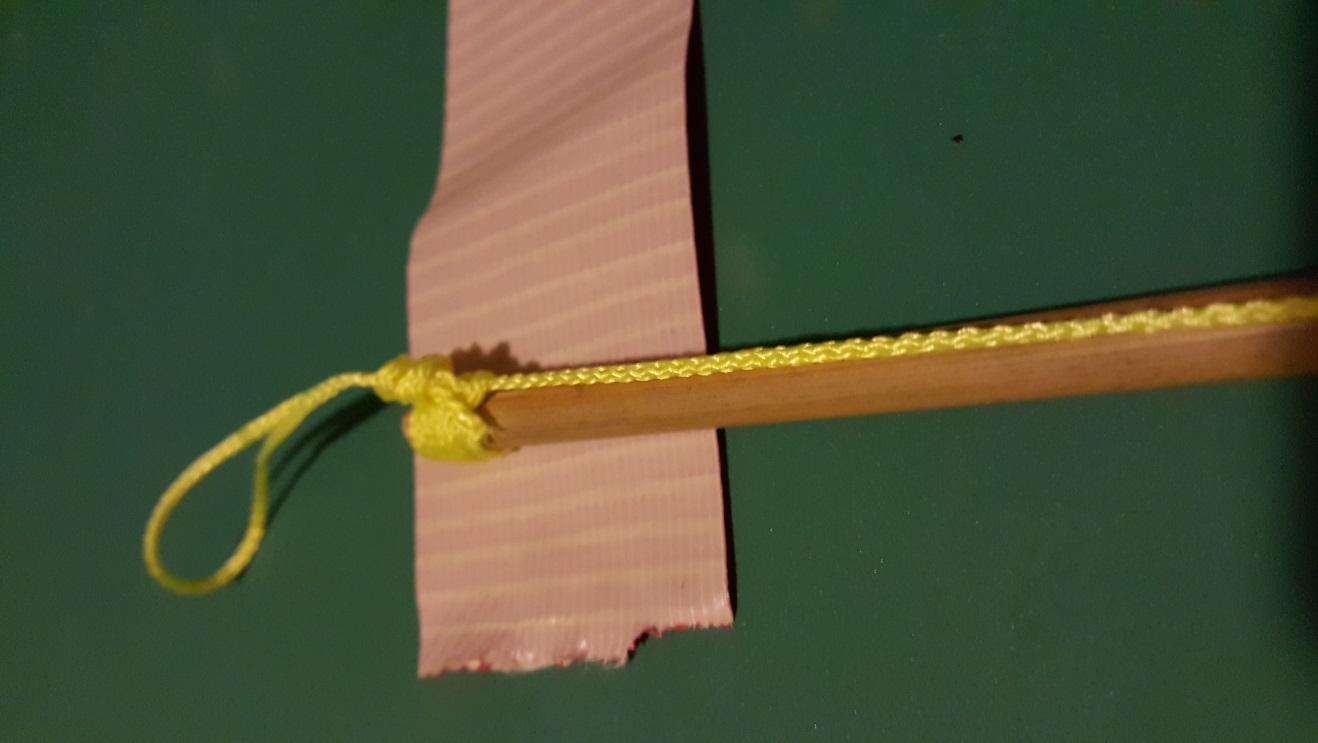

C:\Users\Eric\Pictures\Scouts\fishing pole\20160417_170351.jpg

Fold a flap over.

C:\Users\Eric\Pictures\Scouts\fishing pole\20160417_170456.jpg

Wrap it tightly.


At this point the fishing pole is “done” but you can’t fish with it yet, we’re going to use this loop to attach the string via a larks head knot. The cool thing about this is , it’s really easy to remove it and put a different sting on if this one breaks, knots or you need to cut it.. just unloop it. So let’s tie a piece of line to the pole

Step 10 – Attaching a fishing line

Cut a piece of fishing line. In this document I’m using more masons twine so you can see what I’m doing. In real life I’m using spiderwire high strength fishing line. This is a ridiculous strength of line, 10 lb monofilament line would work great, I’m just a fan of too much is just enough strength, so I use the strong stuff.

Use whatever you can afford. A 10lb fish will probably break these thin bamboo poles, but hey, I’m weird that way.. so strong stuff it is.

Tie a double overhand in the fishing line, just like we did on the end of the pole to form a string non slipping loop. Pull hard on the loop to test if its going to slip, if it slips go online and find a fancy fishing knot.. this worked ok on my spider wire.

You can make your fishing line as long or as short as you want, but I recommend having the line about as long as the pole.

The cool thing about this larks head system is you can change it later easily.
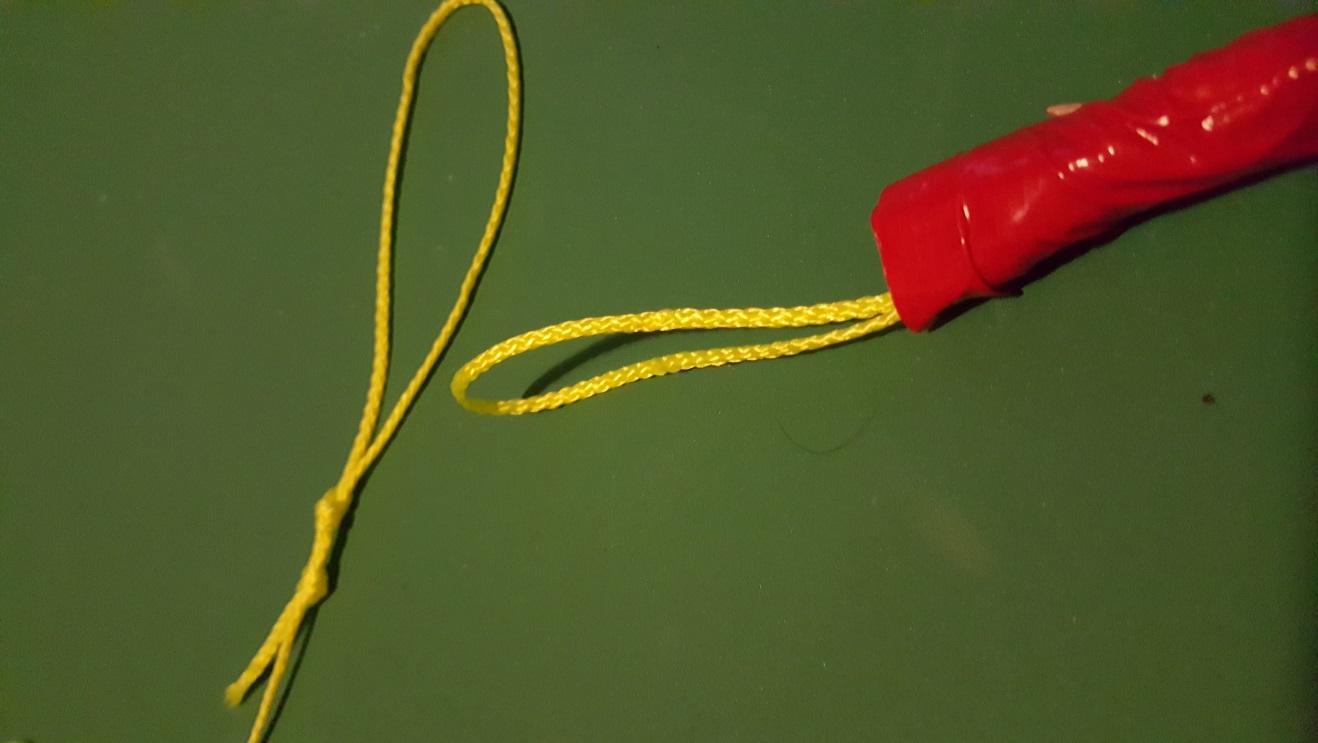
C:\Users\Eric\Pictures\Scouts\fishing pole\20160417_170844.jpg

Now to tie the larks head, slip the fishing line loop up through the loop on then end of the pole.
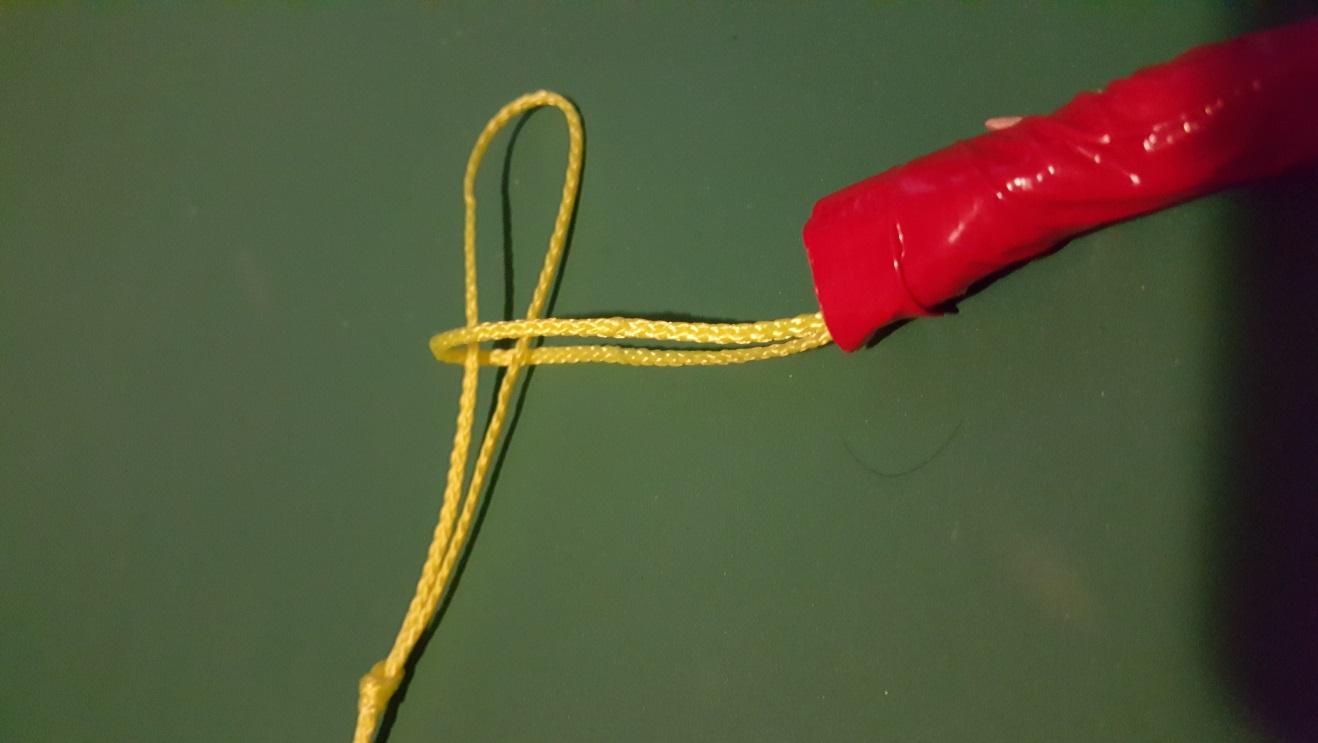
C:\Users\Eric\Pictures\Scouts\fishing pole\20160417_170902.jpg


Take then other end of the fishing line and tuck it through the loop on the fishing line

C:\Users\Eric\Pictures\Scouts\fishing pole\20160417_170929.jpg

Pull the end of the line to tighten the knot
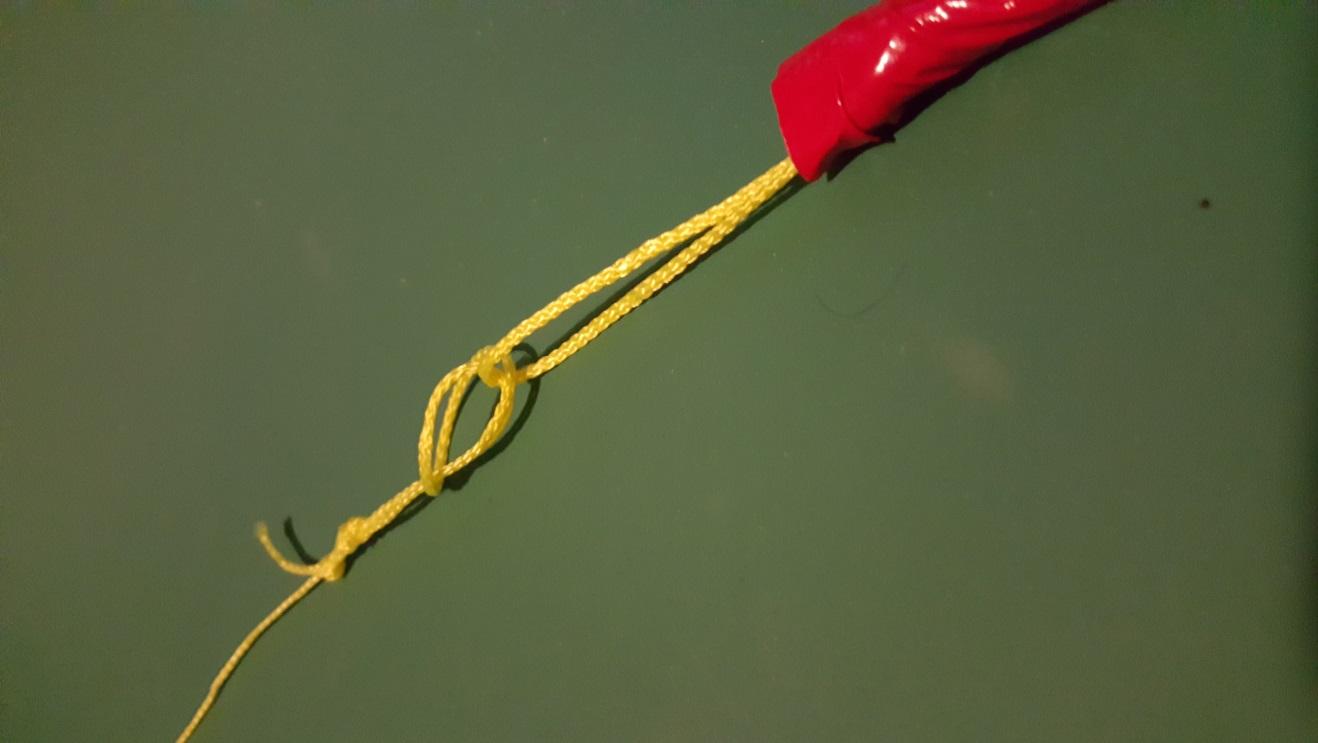
C:\Users\Eric\Pictures\Scouts\fishing pole\20160417_170946.jpg


Pull it tight
C:\Users\Eric\Pictures\Scouts\fishing pole\20160417_171002.jpg


Now put whatever you want on the other end of the line. I put a snap swivel so I can change out my hooks. You could put another larks head and go all primitive, to save money just remember to put a leader on anything so the larks head can't come undone.

I put a snap swivel, with a # 4 hook on it, a pinch weight to pull the hook down and about 12” up from the snap swivel I put a bobber. For panfish (sunfish bluegill etc), what you’ll be catching most of the time as close to the shore as this pole will go, put the hook about halfway to the bottom…by adjusting the bobber further and closer to the snap swivel.

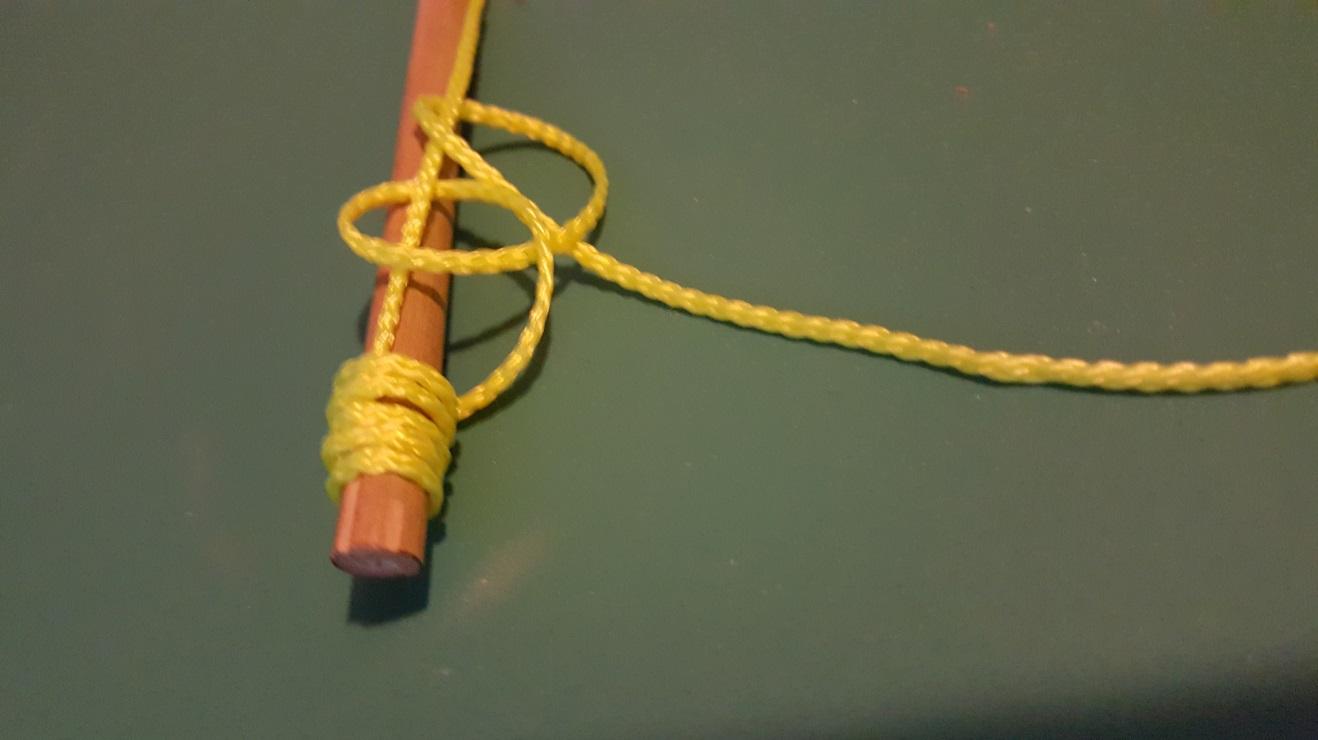
Here is the finished pole with mason's line instead of fishing line (same pic as at the beginning of the document)


Once you know how to tie the knots you can make a pole like this in a few minutes, easily…

I recommend you practice the knots a few times and then make one ahead of your meeting, so you will know how to help the boys/ parent teams get it done.

NOTE: with a 6' pole I had to put a double length(12') of line to get out where the bluegill were... something to be aware of (you can just toss the end out with your other hand, like a hobo rig (which I'd have much rather taught the boys to make than a fishing pole.)).

Tuesday, October 20, 2015

Bear Adventure - Bear Neccessities Making a packing list fun through gamification..


I wanted to make the packing list actiivty as fun as possible so i turned it in to a game

I made a numbered list with things that dont' belong on it.

The the boys searched the list, and when the found one , they raised their hands and told us the number, what is was and why it was not supposed to be on the list... Then the whole Den Crossed it it off the list with a pencil.

I made sure each boy got to do a couple of them, even hinting about what number to look at if they were slower finding items on the list than other boys...

Ie, If one boys hasn't got one yet.  "Okay It's Bobs turn to get one,  lets wait for him, Bob.. wait a bit then add "Bob, why don't you check out # 47...")

Part of the key for this activity is you the leader standing where you can see ALL the scouts, because as boys do, this becomes a bit of organized Chaos. My son was on the opposite side from me and i accidentally skipped his turn, making him sad.

In case you want to rip of the game here is the list..


Scout Personal Camping Equipment List

Activity: There are a handful of items NOT to bring which have snuck on to this list, search the list and Cross them out.

1.     Class A uniform for ceremonies and religious services
2.     Class B/ Activity uniform (troop/pack shirts or any scout shirts) for other activities
3.     Sleeping Bag
4.     Sleeping Pad
5.     Fork, dull knife, spoon, plate
6.     First Aid Kit
7.     Great White Shark
8.     Medication w/ directions
9.     Flashlight – with extra batteries
10.                        Battery Powered Fan (If during hot months)
11.                        Extra Blankets (If during cold months)
12.                        Rain Gear
13.                        Nintendo DS and lots of games
14.                        Uniform & Hanger (Belt up) includes hat
15.                        Extra Pair of pants
16.                        Change of under clothes for each night
17.                        A really huge Snake
18.                        Cub Scout Book
19.                        Axe or Hatchet
20.                        Close toed shoes
21.                        Sword Wielding Ninja
22.                        Appropriate Hiking Shoes or Boots
23.                        Canteen or Water Bottle
24.                        Lawn Mower
25.                        Toiletries (Tooth Paste, Tooth Brush, Deodorant, Baby Wipes, Shampoo, Body wash, Toilet Paper)
26.                        Camp Chair
27.                        Bug Spray
28.                        Yellow Submarine
29.                        Sun Screen
30.                        Medications (give to the adult in charge before leaving)

Optional extra Items

31.                        Pocket knife (If authorized by Den leader and Whittling Chip is earned and on the scout)
32.                        Compass
33.                        Whistle
34.                        Glow Stick
35.                        Sheath Knife (non folding)
36.                        Shower Shoes
37.                        Clothes or gear for special activities (Swimming, Fishing, Canoeing, etc)

Each Adults Gear:

38.                        All the above items+
39.                        Cooler w/ personal/special food items and drinks
40.                        Fishing gear if authorized and/or planned
41.                        Personal cooking stoves, utensils, burners, other camping gear
42.                        Go Cart and Racing Helmet
43.                        Lighter
44.                        Cell Phone and Charger
45.                        Large Ziploc bags
46.                        Pink polka dot Teddy bear in case Adult get’s Lonely sleeping outside.
47.                        Large Trash bags
48.                        Rubber or Plastic Mallet
49.                        Extra Toilet Paper
50.                        Permission slip (give to the adult in charge before leaving)
51.                        Medical forms
52.                        Spare set of car/house keys (Accidents happen)
53.                        Rope or Heavy string


Den Specific Gear

54.                        Cook stoves
55.                        Cookware, Utensils, etc
56.                        Cooler with ice fro drinks
57.                        Cooler with ice foe food
58.                        Plates, Bowels Cups, silverware
59.                        Paper towels
60.                        M1 Abrams Main Battle Tank
61.                        Food
62.                        Dry ice cooler if we want popsicles
a.     Popsicles
63.                        1-2 Folding Table Per 4 scouts
64.                        Propane Lantern
65.                        Tv/DVD player Combo
66.                        Teletubby Costume
67.                        Propane Cylinders
68.                        Trashbags
69.                        Shade Pavillion if wanted
70.                         Boeing 787 Jumbo Jet

Wednesday, August 5, 2015

New Baby Survival Kit


Build a Baby survival kit

Before you goto the hospital for delivery have a basic baby kit in the babys room. They used to sell all this in one kit and we blessed ours so many times it's not funny. put this all together and keep it on the dresser in the babys room.

we got the most awesome baby kit from little remedies but, they don't make it any more. I strongly suggest you put one together... it was a clear box, we kept it on the dresser in the babys room.. I can't tell you how many times we blessed this kit... we had spare ones that stated in the trailer and sca gear boxes..

it included all the stuff in the links below

1. A clear box (does not have to be this fancy, just what I found), but clear is a big help when you glance at it and see the contents, trust me.

http://www.amazon.com/MyGi.../dp/B00KQ7O6XE/ref=sr_1_sc_3...


2. All the basic baby meds, so you always have them on hand (esp Tylenol and ibu and gas meds) + dosing syringes and baby ear cleaner (you want Tylenol and ibuprofen both because sometimes the doc says to alternate if they have a high fever. Plus if you run out of one, you always have enough of the other to get you through the night.)

http://www.amazon.com/Litt.../dp/B00IASG7OM/ref=sr_1_sc_2...


All the basic baby care tools you need
http://www.amazon.com/First.../dp/B000LZFZVS/ref=sr_1_13...


(get a better thermometer too, but keep this one for backup)


add some baby diaper rash stuff, i used this because the name amused me, but use whatever..get tube not jar, it's easier to open with one hand


http://www.amazon.com/Boudreauxs-Butt-Paste-Ointment-Protectant/dp/B001190D5Q/ref=sr_1_2?s=baby-products&ie=UTF8&qid=1438813052&sr=1-2&keywords=butt+paste

add a small dim flashlight to it... or on you can cover with you hand to regulate the light. Needs to click on and off so you can point it at the far wall, set it down and use the indirect light. but not so small you can lose it.

http://www.amazon.com/Dorcy-41-4241-Resistant-Flashlight-19-Lumens/dp/B0053WM5G2/ref=sr_1_2?s=hardware&ie=UTF8&qid=1438812797&sr=1-2&keywords=SMALL+FLASHLIGHT 


You dont' need all of these, but a brush and the syringe with the special rubber stopper (lets you get baby meds our of any sized bottle) are especially handy (the nail clipper and syringe are duplicates of the one in the kit above)


 http://www.amazon.com/Safety-1st-Care-Baby-Set/dp/B00LKDK4XO/ref=sr_1_26?s=baby-products&ie=UTF8&qid=1438813160&sr=1-26-spons&keywords=new+parent+kit
I can''t tell you how awesome it was to always have these right at hand, in one box, when they woke up in the middle of the night.

Now in a separate place make sure you have the following, the goal is to have enough supplies to stay home for 2 weeks... I know that sounds like way to much , but trust me on this.


1 large box of newborn diapers, get a good brand if you can afford it
1 can of instant baby formula (or pre made, but several days worth), hope you never need to open it, but it's better to have it on hand then not if you need it at 2am.
large box of baby wipes..

Plus Whatever kind of bottles you are going to use...I liked the ones with liners,